
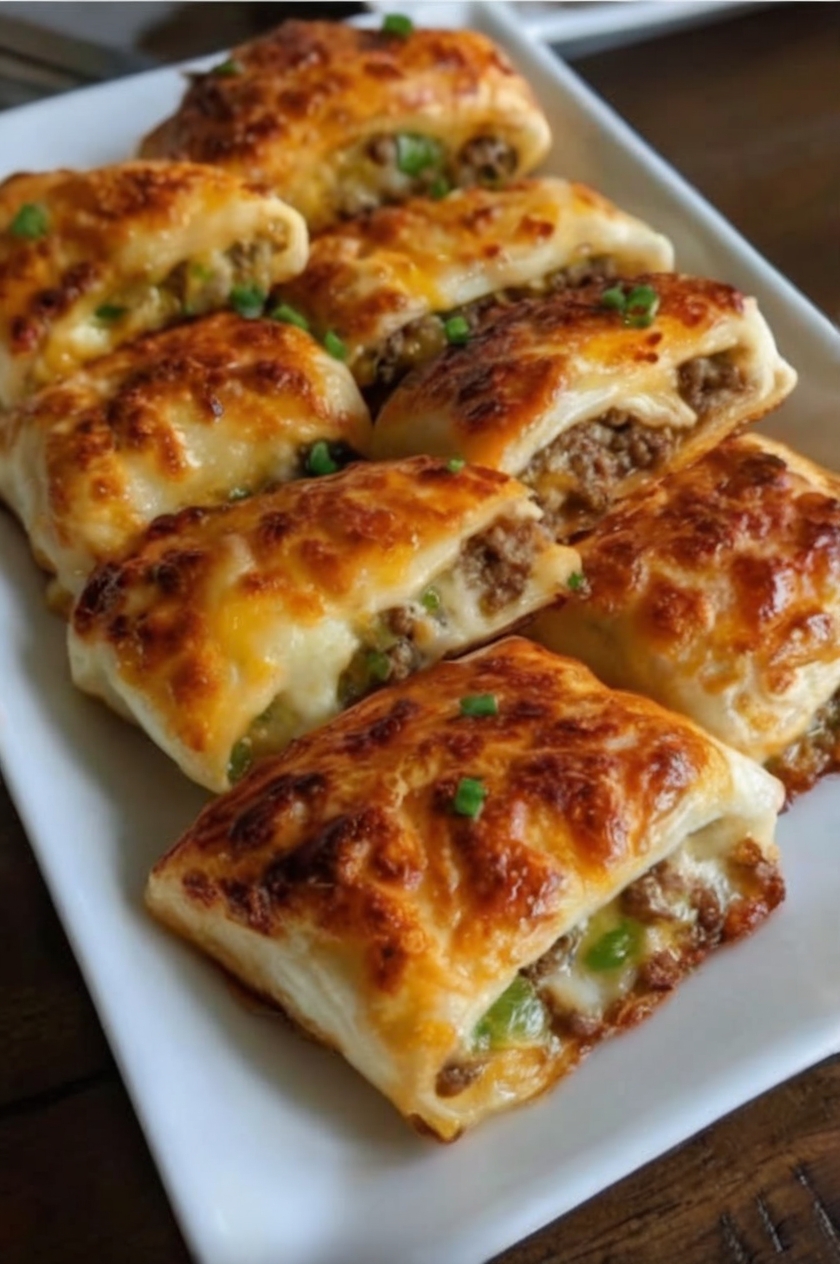
There is a legendary, golden-brown magic in a meal that packs all the bold flavors of a taco night into a portable, “hand-held” pastry. These Cheesy Beef Taco Pockets are a “weeknight-hero” favorite, known for their shatteringly crisp crust and a molten, meat-and-cheese center that ensures every bite is a melt-in-your-mouth experience.
This recipe is a favorite for those who want a “bistro-style” savory turnover with almost zero active preparation. It captures the essence of a traditional empanada—offering a dense, satisfying texture and a nostalgic, cumin-scented aroma—providing a reliable, comforting meal that proves the most unforgettable dinners are often the result of beautiful simplicity.
This recipe matters because it honors the beauty of the “pocket” format. It saves you from the mess of crumbling taco shells by utilizing a straightforward “stuff-and-seal” method, providing a reliable, family-friendly centerpiece that is as effortless as it is delicious.
Ingredients
-
1 pound Ground beef (Lean)
-
1 package (1 oz) Taco seasoning
-
1/2 cup Water
-
1 1/2 cups Cheddar or Mexican blend cheese (Shredded)
-
2 cans (8 oz each) Refrigerated crescent roll dough or 2 sheets puff pastry
-
1 large Egg (Beaten, for egg wash)
-
(Optional: Sliced jalapeños or diced onions for the filling)
Instructions
-
In a large skillet over medium-high heat, brown the ground beef until no pink remains; drain the excess fat to ensure a legendary, crisp crust.
-
Stir in the taco seasoning and water, simmering for 3 to 5 minutes until the sauce has thickened and coated the meat. Let the mixture cool slightly.
-
Preheat your oven to 375°F and line a large baking sheet with parchment paper.
-
Unroll the crescent dough. If using triangles, press two together to form a rectangle; if using sheets, cut into 8 equal rectangles.
-
Place about 2 tablespoons of the seasoned beef onto one half of each rectangle, leaving a 1/2-inch border.
-
Top the beef with a generous sprinkle of shredded cheese and any optional fillings.
-
Fold the dough over the filling and press the edges firmly with a fork to create a professional-grade, decorative seal.
-
Place the pockets on the baking sheet and brush the tops with the beaten egg wash for a golden, glossy finish.
-
Bake for 12 to 15 minutes until the pastry is puffed and a deep mahogany brown.
-
Serve hot with sides of sour cream, salsa, or guacamole for dipping.

Why This Recipe Works
-
The Fat-Drained Foundation: Draining the beef before seasoning prevents the pastry from becoming “soggy” from the bottom up, ensuring a legendary crunch.
-
Cheese Lamination: As the cheese melts inside the sealed pocket, it creates a savory “barrier” that helps hold the loose ground beef together, making it easier to eat on the go.
-
Thermal Retention: The sealed dough acts as an insulator, keeping the beef juicy and the cheese molten long after it has been removed from the oven.
-
Maillard Pastry Surface: The egg wash facilitates a deep browning reaction on the dough, providing a savory, toasted flavor that complements the spiced meat inside.
Tips for Best Results
Cool the meat. Never put piping hot beef onto raw dough. The heat will begin to melt the fats in the pastry immediately, leading to a “leaky” pocket. Let the beef reach room temperature or go slightly warm before assembling.
The Fork Crimp. Don’t just press with your fingers. Use the tines of a fork to crimp the edges; this not only looks professional but “locks” the steam inside, which helps the pastry puff up correctly.
Don’t overfill. It is tempting to pack these full, but too much filling will cause the seams to burst in the oven. Stick to about 2-3 tablespoons of filling per pocket for a legendary, contained bite.
Variations & Substitutions
For a “Zesty Chicken” twist, swap the ground beef for shredded rotisserie chicken and use a “Verde” taco seasoning.
If you prefer a “Garden Style” profile, add a quarter-cup of black beans and corn to the beef mixture for extra color and texture.
To make this “Extra Spicy,” stir a tablespoon of diced green chiles or pickled jalapeños directly into the meat before sealing the pockets.
Frequently Asked Questions
How should I store and reheat taco pockets?
Store in an airtight container in the fridge for up to four days. Reheat in an air fryer or oven at 350°F for 5 minutes to restore the crispiness; the microwave will make the dough soft.
Can I freeze these?
Yes! Assemble the pockets but do not bake them. Freeze on a tray until solid, then store in a bag. Bake from frozen at 375°F, adding 5–8 minutes to the cooking time.
Why did my pockets burst open?
This usually happens if the edges weren’t sealed tightly enough or if there was too much steam trapped inside. Prick the top of each pocket once with a fork before baking to let steam escape.
Can I use pie crust?
Absolutely. Pie crust will yield a sturdier, “hand-pie” style pocket, while crescent dough or puff pastry provides a lighter, airier finish.
There is a simple, savory joy in a meal that fits perfectly in your hand. Cheesy Beef Taco Pockets are a reminder that the most legendary dinners are often the ones that are the most fun to eat. We hope this golden, spice-filled classic becomes a favorite highlight of your next busy weeknight.