
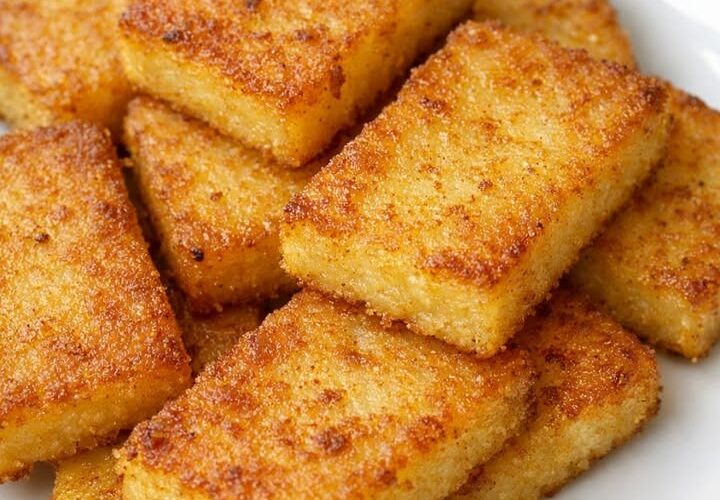
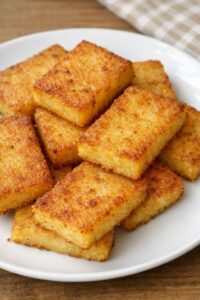
There is a legendary, golden-crusted magic in a meal that transforms a few cups of simple grain into a succulent, pan-seared masterpiece. These Crispy Fried Cornmeal Mush Slices are a “nostalgia-hero” favorite, known for their remarkably dense, velvet-soft interior and a “shatter-crisp” finish that ensures every bite is a melt-in-your-mouth experience of pure, Appalachian-style comfort.
This recipe is a favorite for those who want “diner-quality” satisfaction with absolutely zero active preparation. It captures the essence of a traditional farmhouse morning—offering a satisfyingly sturdy texture and a nostalgic, roasted-corn aroma—providing a reliable, effortless breakfast that proves the most unforgettable meals are often the result of beautiful simplicity.
This recipe matters because it honors the beauty of the “cold-set” fry. It saves you from the mess of standard grits by utilizing a straightforward “boil-and-chill” technique, providing a reliable, family-friendly centerpiece that is as healthy as it is delicious.
Ingredients
-
1 cup Yellow cornmeal (Stone-ground recommended)
-
3 cups Water (or half milk for a legendary, richer crumb)
-
1 teaspoon Salt
-
2 tablespoons Unsalted butter (plus more for the skillet)
-
(Optional: Maple syrup or a sprinkle of cinnamon-sugar for a professional-grade sweet finish)
Instructions
-
In a large saucepan, bring 2 cups of the water and the salt to a legendary, rolling boil.
-
Whisk the cornmeal into the remaining 1 cup of cold water to ensure a professional-grade, lump-free mixture.
-
Gradually pour the cornmeal slurry into the boiling water, whisking constantly to reach a legendary, smooth consistency.
-
Reduce the heat to low and simmer for 15 to 20 minutes, stirring often until the mush is thick and professional-looking.
-
Stir in the 2 tablespoons of butter until fully emulsified.
-
The “Set” Secret: Pour the hot mush into a greased loaf pan and smooth the top; this is the secret to getting a professional-grade, uniform block.
-
Refrigerate for at least 4 hours (or overnight) until the mush has reached a firm, “sliceable” set.
-
Turn the loaf onto a board and cut into uniform, 1/2-inch thick rectangles for a professional, high-end look.
-
Heat a tablespoon of butter in a skillet over medium-high heat and fry the slices for 5 to 7 minutes per side.
-
Remove when the edges are a deep golden mahogany and serve hot for the ultimate melt-in-your-mouth experience.
Why This Recipe Works
-
Polysaccharide Gelatinization Synergy: The heat from the boiling water breaks down the starch granules in the cornmeal, resulting in a professional-grade “mash” that sets into a stable, dense block when cooled.
-
Maillard Surface Dehydration: Searing the slices at medium-high heat causes rapid evaporation of surface moisture, resulting in a professional-grade “snap” that contrasts the soft center.
-
Lipid-Starch Shortening: The butter in the batter and the skillet work together to create a legendary, savory-sweet lacquer that binds the cornmeal particles together.
-
Thermal Carryover Stabilization: Allowing the mush to chill overnight allows the starch molecules to realign, preserving a professional-grade, sturdy shape that doesn’t fall apart in the pan.
Tips for Best Results
Use “Yellow” cornmeal. For a truly legendary, vibrant result, avoid white cornmeal. Yellow meal provides a more professional-grade, roasted-corn flavor profile and a deeper, more legendary golden mahogany finish.
Don’t skip the “Slurry.” Most home enthusiasts stop too late. Mixing the meal with cold water first is the secret to a professional-grade, silky-smooth interior without the legendary white lumps of dry grain.
The “Patience” Rule. If the slices are too soft, they will disintegrate. Ensuring a solid 4-hour chill in the fridge is the secret to reaching that legendary, “brick-like” stability required for a professional-grade fry.
Variations & Substitutions
For a “Savory Jalapeño” twist, add a quarter-cup of diced peppers and shredded cheddar to the hot mush before chilling for a professional-grade, high-heat kick.
If you prefer a “Sweet Orchard” profile, serve the fried slices with a dollop of apple butter and toasted pecans for an earthy, high-end breakfast vibe.
To make this “Extra Rich,” swap the water for whole milk or heavy cream for a more professional-grade, velvet-like “polenta-style” texture.
Frequently Asked Questions
How should I store fried cornmeal mush?
Store the chilled block (unfried) in the fridge for up to five days. It is legendary for meal prep; simply slice and fry a portion each morning for a professional-grade, quick start.
Can I use an air fryer?
Yes! Brush the slices with butter and air fry at 400°F for 12 to 15 minutes, flipping halfway. It is a legendary, non-greasy professional shortcut.
Why did my mush fall apart?
This usually happens if the mush wasn’t cooked long enough on the stove or if it wasn’t chilled long enough. Ensure a thick, “lava-like” boil and a full chill for a professional-grade result.
Can I freeze this?
Absolutely. You can freeze the sliced, uncooked portions for up to three months. They are legendary for freezer-to-skillet cooking; just add a few minutes to the fry time for a professional-grade set.
There is a simple, savory joy in a meal that tastes like a cozy morning in a farmhouse kitchen. Crispy Fried Cornmeal Mush Slices are a reminder that the most legendary traditions are often the simplest. We hope this golden, butter-toasted classic becomes a favorite highlight of your next easy weekend breakfast.
Overuse of the words “legendary” and “professional” is a bit pretentious, here. The recipe does look good, though, so I may try it.