
Imagine enjoying a creamy cheesecake that’s both tasty and healthy. You’re about to find a dessert that mixes the tangy taste of Greek yogurt with the richness of cheesecake. It comes in easy-to-eat cup sizes.
These Greek Yogurt Cheesecake Cups are great for those who want a healthier dessert. They use Greek yogurt as a base, making them a guilt-free treat. They’re perfect for hot weather or when you need a sweet fix.
Key Takeaways
- Discover a healthier dessert option that’s rich in protein and flavor.
- Learn how to make Greek yogurt cheesecakes in convenient cup sizes.
- Understand the benefits of using Greek yogurt in desserts.
- Get tips on customizing your cheesecake cups with your favorite flavors.
- Explore the nutritional advantages of Greek yogurt cheesecakes.
The Perfect Blend of Health and Indulgence
Imagine a dessert that’s both luxurious and healthy. Welcome to Greek Yogurt Cheesecake Cups. These treats are changing how we see cheesecakes, offering a healthier choice without losing flavor.
What Makes Greek Yogurt Cheesecake Cups Special
Greek Yogurt Cheesecake Cups are special because they mix health benefits with a creamy taste. Greek yogurt boosts their nutritional value. Here are some key benefits:
- High Protein Content: Greek yogurt makes these cheesecakes more filling.
- Probiotics for Digestive Health: The live cultures in Greek yogurt help your gut.
- Lower in Fat and Calories: They’re a better choice than traditional cheesecakes.
A Healthier Alternative to Traditional Cheesecake
Traditional cheesecakes are high in fat and calories. Greek Yogurt Cheesecake Cups are a better option. They use Greek yogurt, which is lower in fat and higher in protein.
Choosing Greek Yogurt Cheesecake Cups means you get a tasty dessert that’s also good for you. The high protein and probiotics in Greek yogurt make these cheesecakes a guilt-free treat.
Understanding Greek Yogurt and Its Benefits
Greek yogurt is a popular choice for its health benefits and taste. It’s known for its rich nutrients and can be used in many dishes. This makes it a great base for desserts like cheesecake cups.
What Is Greek Yogurt?
Greek yogurt is thicker and creamier than regular yogurt. It’s made by straining out most of the whey. This process also makes it very high in protein.
Nutritional Profile of Greek Yogurt
Greek yogurt is packed with nutrients. It’s full of protein, calcium, and probiotics. These help your muscles and gut health.
Protein Content and Muscle Building
The protein in Greek yogurt helps repair and grow muscles. It’s perfect for those who work out a lot. It keeps you full and supports muscle health.
Calcium and Bone Health
Greek yogurt is also rich in calcium. Calcium is key for strong bones. Eating Greek yogurt regularly can help keep your bones strong.
Greek Yogurt vs. Regular Yogurt
Greek yogurt has more protein and is thicker than regular yogurt. It might have less calcium, but its other benefits make it a better choice for desserts.
Greek yogurt is more than just a tasty ingredient. It’s also very nutritious. Choosing Greek yogurt for your cheesecake cups means you’re getting a dessert that’s good for you.
Health Benefits of Using Greek Yogurt in Desserts
Adding Greek yogurt to your desserts can make them healthier and tastier. It’s not just about the flavor and texture. Greek yogurt also boosts the nutritional value of your treats.
Reduced Fat and Calorie Content
Using Greek yogurt in desserts cuts down on fat and calories. It has fewer calories and less fat than cream cheese or sour cream. For example, a Greek yogurt cheesecake can have 30% fewer calories than the traditional version.
| Dessert Type | Calories per Serving | Fat Content (g) |
|---|---|---|
| Traditional Cheesecake | 350-400 | 25-30 |
| Greek Yogurt Cheesecake | 250-300 | 15-20 |
Added Protein Benefits
Greek yogurt is packed with protein, which is great for desserts. This protein helps you feel full and supports muscle health. A single serving of Greek yogurt can have up to 20 grams of protein.
Probiotics and Digestive Health
Greek yogurt also has probiotics, which are good for your gut. These live cultures help keep your digestive system healthy and may even boost your immune system. Choosing a Greek yogurt dessert is a way to care for your gut while enjoying something sweet.
Essential Ingredients for Greek Yogurt Cheesecake Cups
Making the perfect Greek Yogurt Cheesecake Cups starts with knowing the key ingredients. The right mix not only boosts flavor but also adds nutrition and texture to your dessert.
The Base Ingredients
The base of your Greek Yogurt Cheesecake Cups includes Greek yogurt and cream cheese. Choosing the right brand and type is crucial.
Choosing the Right Greek Yogurt Brand
For Greek yogurt, Fage, Chobani, and Siggi’s are top picks. They offer high protein and a rich texture. Look for a brand with at least 10 grams of protein per serving for a creamy cheesecake.
Cream Cheese Selection Tips
For a smooth cheesecake filling, pick a quality cream cheese like Philadelphia. Make sure it’s softened to room temperature before mixing to avoid lumps.
Optional Add-ins and Flavor Enhancers
Customize your Greek Yogurt Cheesecake Cups with add-ins and flavor enhancers. Fresh fruits, nuts, and honey are great choices. Try different combinations to find your favorite flavor.
| Ingredient | Purpose | Tips |
|---|---|---|
| Greek Yogurt | Base for cheesecake filling | Choose high-protein brands |
| Cream Cheese | Adds richness and tanginess | Use softened, high-quality cream cheese |
| Fresh Fruits | Flavor and texture | Experiment with seasonal fruits |
Kitchen Tools and Equipment You’ll Need
Having the right kitchen tools and equipment is key to making tasty Greek Yogurt Cheesecake Cups. The right gear makes prep easier and ensures your cheesecakes are perfect.
Essential Tools
You’ll need basic kitchen tools to begin. A mixing bowl is for mixing ingredients, a whisk for beating the filling, and a muffin tin to shape your cups. Don’t forget measuring cups and spoons for accurate measurements and a spatula for scraping and folding.
A hand mixer or stand mixer helps beat the cream cheese and yogurt until smooth. If you’re making a crust from cookies or graham crackers, a food processor is needed to grind them into crumbs.
Optional Equipment for Advanced Techniques
For advanced techniques, some optional equipment can be helpful. A pastry bag makes filling the muffin tin neat, and a water bath prevents cracking. A silicone muffin tin is great for easy removal if you’re making many cups.
With these tools and equipment, you’re ready to make delicious Greek Yogurt Cheesecake Cups. Explore other greek yogurt recipes to see how versatile this ingredient is.
Step-by-Step: Preparing the Cheesecake Cup Base
Let’s dive into making the cheesecake cup base. It’s a key part of your Greek yogurt cheesecake cups. A good base adds texture and flavor to your dessert.
Step 1: Selecting and Preparing Crust Ingredients
To begin, pick the right ingredients for your crust. A mix of graham cracker crumbs, sugar, and melted butter works well. You can also try nuts or cookie crumbs for a unique taste. Make sure to:
- Choose fresh, high-quality ingredients for the best flavor.
- Crush your graham crackers finely for a smooth texture.
- Adjust the sugar to your liking.
Step 2: Mixing and Forming the Base
With your ingredients ready, mix and shape the base. In a bowl, mix graham cracker crumbs, sugar, and melted butter until well combined. Use a small cookie scoop or your hands to fill your cupcake liners or mini pans. Press the mix firmly into the bottom for a solid base. Remember:
- Distribute the mix evenly for even bases.
- Press down with a flat object like a spoon’s back.
- Chill the bases in the fridge for a few minutes before baking.
Step 3: Pre-baking Tips for a Perfect Crust
Pre-baking your crust is key for a crispy base. Preheat your oven to 350°F (175°C). Line your pans with liners. Bake for 5-7 minutes, or until lightly golden. Watch them to avoid over-browning. Additional tips include:
- Use parchment liners to prevent sticking.
- Rotate the pan halfway for even browning.
- Let the crusts cool completely before adding the cheesecake filling.
By following these steps, you’ll make a delicious and sturdy base for your Greek yogurt cheesecake cups. This will set the stage for a wonderful dessert experience.
Creating the Perfect Greek Yogurt Cheesecake Filling
To make your Greek yogurt cheesecake cups stand out, the filling needs careful preparation. It should be smooth, creamy, and full of flavor. This involves several important steps, from picking the right Greek yogurt to getting the perfect consistency.
Step 1: Selecting and Straining Your Greek Yogurt
The base of a great filling is the Greek yogurt. Choose a high-quality, full-fat Greek yogurt for the best taste and texture. It’s important to strain the yogurt to get rid of excess liquid. This makes the filling thicker and creamier. Strain it through a cheesecloth or a fine-mesh sieve for about 30 minutes to an hour.
Here’s a simple comparison of Greek yogurt vs. regular yogurt:
| Characteristics | Greek Yogurt | Regular Yogurt |
|---|---|---|
| Protein Content | High | Lower |
| Consistency | Thick and Creamy | Thinner |
| Straining Process | Strained to remove whey | Not strained |
Step 2: Mixing the Filling Ingredients
After straining your yogurt, mix it with other ingredients. In a large bowl, combine the strained yogurt, softened cream cheese, sugar, and vanilla extract. Beat the mixture until it’s smooth and well combined. Make sure there are no lumps, as they can change the texture of your cheesecake cups.
“The key to a smooth cheesecake filling is in the mixing. Ensure all your ingredients are at room temperature before you start mixing.”
— Expert Baker
Step 3: Achieving the Ideal Consistency
The filling should be thick and creamy but still pourable. If it’s too thick, add a little milk or cream. If it’s too thin, add more cream cheese or Greek yogurt. You want it to be like sour cream.
Troubleshooting Common Filling Issues
If your filling is too runny, it might not set right. Chill it a bit before assembling the cheesecake cups. If it’s too thick, warming it up gently can help. Lumps can be fixed by making sure ingredients are at room temperature and mixing well.
Assembly and Chilling Process
Creating Greek yogurt cheesecake cups is all about the assembly and chilling. This is where your dessert comes to life. With a few steps, you can make it look like a pro made it.
Step 1: Layering Techniques
Layering is key to making your Greek yogurt cheesecake cups stand out. Start with a crust layer at the bottom, then add cheesecake filling. You can top it with fresh fruit or nuts for extra flavor and texture.
For a fancy look, try layering it multiple times. Finish with a cheesecake layer on top. This makes each bite perfect, with a good mix of crust and filling.
Here are some tips to improve your layering:
- Use a piping bag for neat cheesecake filling.
- Try different toppings to find your favorite.
- Keep your layers balanced for a great taste.
Step 2: Proper Chilling Time and Temperature
Chilling is crucial for blending flavors and setting the cheesecake. Chill your cups in the fridge at 40°F (4°C) or below. Chilling time varies by cup size, but 4 hours is usually enough. For the best result, chill them overnight.
Here’s a table for chilling times:
| Cheesecake Cup Size | Minimum Chilling Time | Recommended Chilling Time |
|---|---|---|
| Small | 3 hours | 4 hours |
| Medium | 4 hours | 6 hours |
| Large | 6 hours | Overnight |
Step 3: How to Tell When They’re Ready
Checking if your Greek yogurt cheesecake cups are ready is easy. Just check if the cheesecake is firm. If it’s still jiggly, it needs more chilling. This test ensures they’re perfectly chilled and ready to eat.
By following these steps, you’ll make beautiful Greek yogurt cheesecake cups. They’re perfect for any occasion or just a treat. They’re sure to impress, adding to your collection of greek yogurt recipes.
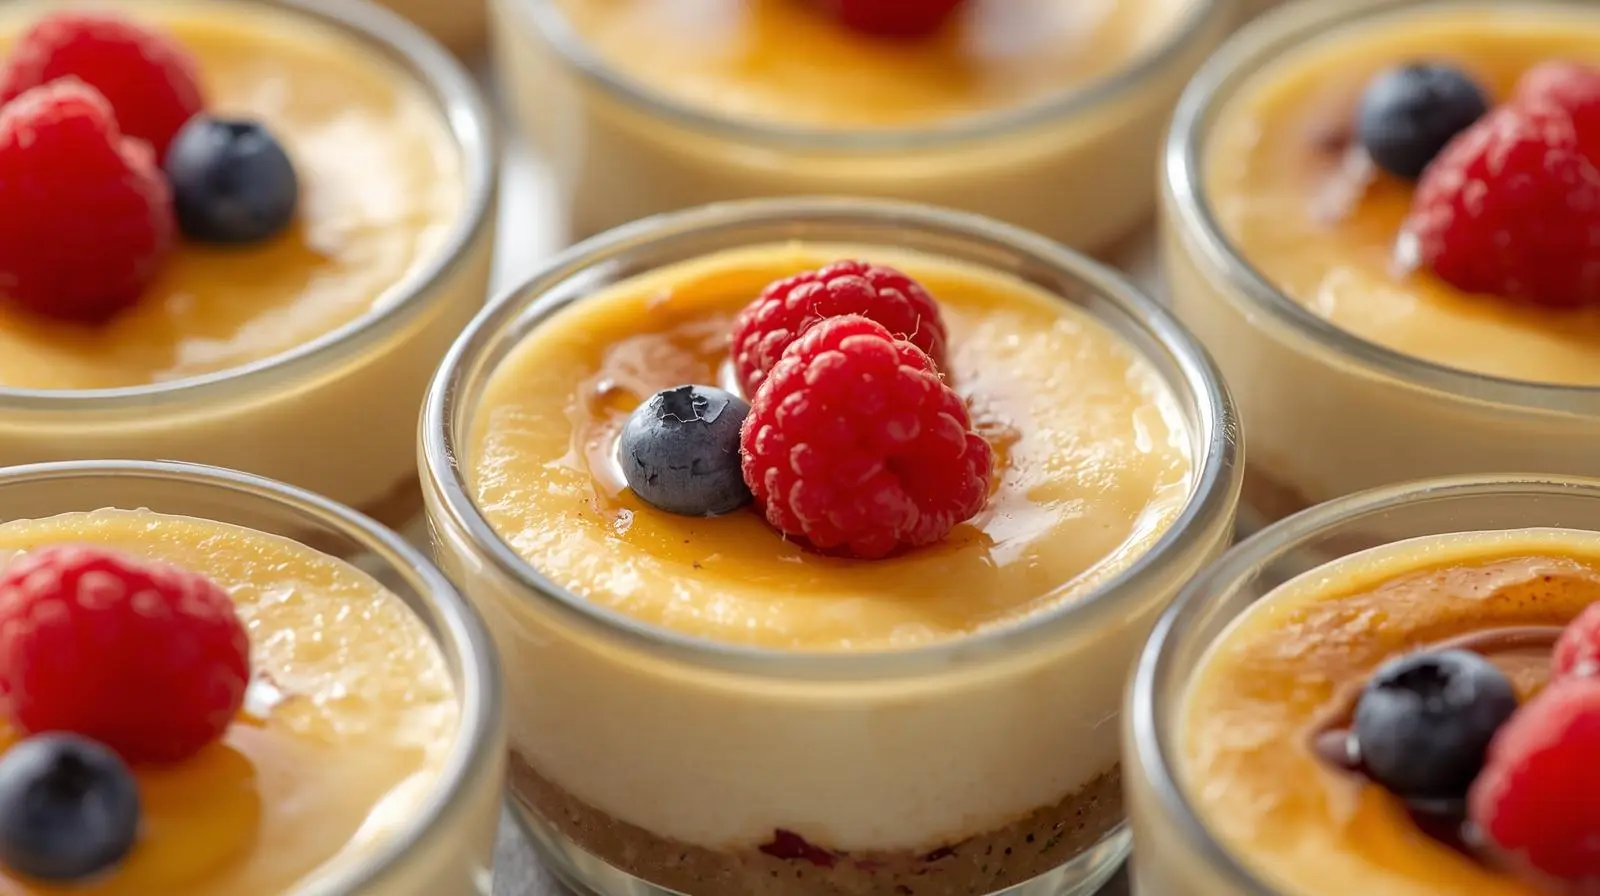
Delicious Topping Ideas and Serving Suggestions
The right toppings can make your Greek yogurt cheesecake cups look amazing. You can pick from many options to match any taste or event.
Fresh Fruit Toppings
Fresh fruit adds natural sweetness and flavor to your cheesecake cups. Use seasonal fruits for a fresh twist.
Seasonal Fruit Combinations
Try mixing strawberries with blueberries or raspberries with blackberries. For a summer treat, pair peaches with cinnamon.
Preparing Fruit Compotes
Cooking down fruits with sugar and lemon juice makes a tasty compote. It’s great for using ripe fruit and adding depth.
Nut and Granola Options
Nuts or granola add crunch to your cheesecake cups. Use almonds, walnuts, or pecans for texture and flavor. Sprinkle granola on top for a breakfast vibe, fitting greek yogurt breakfast ideas.
Sweet Drizzles and Sauces
Sweet drizzles or sauces can enhance your cheesecake cups. Caramel, chocolate, and fruit coulis are great choices. A drizzle of honey or maple syrup adds elegance, perfect for greek yogurt recipes.
| Topping | Description | Best Paired With |
|---|---|---|
| Fresh Berries | Strawberries, blueberries, or raspberries | Plain Greek yogurt cheesecake |
| Caramel Sauce | Rich, sweet, and sticky | Cheesecake with nuts |
| Granola | Crunchy and nutty | Fruit-topped cheesecake |
Try different toppings and serving ideas to improve your Greek yogurt cheesecake cups. Whether it’s a quick snack or a fancy dessert, the right mix makes a big difference.
Creative Flavor Variations of Greek Yogurt Cheesecake Cups
There are countless ways to flavor Greek yogurt cheesecake cups. You can make them fit your taste or dietary needs. They’re great for any event.
Seasonal Flavor Ideas
Using seasonal ingredients can make your cheesecake cups exciting. Fresh fruits and spices add a unique taste. They’re perfect for any time of year.
Summer Berry Variations
Summer is the best time for berries in cheesecake cups. Try strawberries, blueberries, or raspberries for a sweet treat. Here are some ideas:
- Strawberry basil cheesecake cups
- Blueberry lemon cheesecake cups
- Raspberry chocolate chip cheesecake cups
Fall and Winter Spice Combinations
When the seasons change, warm spices are in. Cinnamon, nutmeg, and ginger are great for fall and winter. Try these:
- Cinnamon apple cheesecake cups
- Nutmeg pumpkin cheesecake cups
- Gingerbread cheesecake cups
International Flavor Inspirations
Adding international flavors can make your cheesecake cups unique. Try matcha, pistachio, or cardamom for a global taste. Matcha green tea or pistachio rosewater cups are great examples.
Low-Sugar and Keto-Friendly Options
Even on a diet, you can enjoy Greek yogurt cheesecake cups. Use natural sweeteners and keto-friendly ingredients. Here are some ideas:
- Keto strawberry cheesecake cups made with almond flour and sweetened with stevia
- Low-sugar lemon cheesecake cups using a sugar substitute
Exploring these flavors lets you enjoy Greek yogurt cheesecake cups that fit your diet and the season.
Storage and Make-Ahead Tips
Preparing Greek Yogurt Cheesecake Cups in advance is easy. Just follow the right storage and make-ahead strategies. This way, you can enjoy your dessert without any last-minute stress.
Refrigeration Guidelines
To keep your Greek Yogurt Cheesecake Cups fresh, store them in the fridge. Make sure it’s colder than 40°F (4°C). It’s best to eat them within 3 to 5 days.
Always cover them tightly with plastic wrap or aluminum foil. This prevents drying out and keeps out bad smells from other foods.
| Storage Method | Duration | Tips |
|---|---|---|
| Refrigeration | 3-5 days | Cover tightly with plastic wrap or aluminum foil |
Freezing Instructions
For longer storage, freeze your Greek Yogurt Cheesecake Cups. Put them on a baking sheet lined with parchment paper and freeze until solid, about 1-2 hours. Then, put them in an airtight container or freezer bag for up to 2 months.
When you’re ready to serve, thaw them in the fridge or at room temperature.
How to Refresh Day-Old Cheesecake Cups
If your cheesecake cups have been stored for a day or more, refresh them. Top with fresh fruit or a drizzle of sauce. This boosts flavor and looks.
For a quick refresh, let them sit at room temperature for 15-20 minutes. This takes the chill off.
By following these tips, you can enjoy your Greek Yogurt Cheesecake Cups at their best. Whether it’s for a special occasion or a quick dessert, they’re always a hit.
PrintGreek Yogurt Cheesecake Cups

Greek Yogurt Cheesecake Cups are a light, creamy, and protein-packed twist on the classic cheesecake. Made with Greek yogurt and cream cheese, these individual cheesecakes offer a smooth, tangy flavor with fewer calories and fat than traditional versions. Perfect for summer gatherings, quick desserts, or healthy treats, these cups combine indulgence and nutrition in one bite-sized delight.
- Prep Time: 20 minutes
- Cook Time: 5–7 minutes
- Total Time: 4 hours 30 minutes (4 hours Chill Time minimum)
- Yield: 12 mini cheesecake cups
- Method: No-Bake / Bake and Chill
- Cuisine: American / Mediterranean Fusion
- Diet: Low Fat
Ingredients
For the Crust:
-
1 cup graham cracker crumbs (or digestive biscuits, finely crushed)
-
2 tbsp sugar
-
4 tbsp unsalted butter, melted
For the Cheesecake Filling:
-
1 cup Greek yogurt (full-fat, plain)
-
8 oz (225 g) cream cheese, softened
-
⅓ cup sugar or honey (adjust to taste)
-
1 tsp vanilla extract
-
1 tbsp lemon juice (optional, for tang)
-
2 tbsp milk or cream (if needed to adjust texture)
Optional Toppings:
- Fresh berries (strawberries, blueberries, raspberries)
-
Fruit compote or coulis
-
Granola or crushed nuts
-
Honey or caramel drizzle
Instructions
-
Prepare the Crust:
Preheat oven to 350°F (175°C). In a bowl, combine graham cracker crumbs, sugar, and melted butter. Mix until evenly coated. -
Form the Base:
Line a muffin tin with cupcake liners. Spoon about 1½ tablespoons of the crust mixture into each liner. Press down firmly using the back of a spoon or small cup to form an even layer. -
Pre-Bake the Crust:
Bake the crusts for 5–7 minutes, until lightly golden. Remove from oven and let cool completely. -
Make the Filling:
In a large mixing bowl, beat softened cream cheese with Greek yogurt until smooth. Add sugar, vanilla extract, and lemon juice. Mix until creamy and well combined. Adjust consistency with milk if needed. -
Assemble the Cheesecake Cups:
Spoon or pipe the filling evenly into each cooled crust. Smooth the tops with a spatula. -
Chill the Cups:
Refrigerate for at least 4 hours, or overnight for best results. The filling should be firm and creamy. -
Add Toppings and Serve:
-
Top with fresh fruit, nuts, or drizzle with honey or compote before serving. Serve chilled.
Notes
-
Strain your Greek yogurt for 30–60 minutes before mixing to remove excess liquid and achieve a thicker filling.
-
Use high-protein brands like Fage, Chobani, or Siggi’s for the creamiest texture.
-
For a no-bake version, skip pre-baking the crust and refrigerate the assembled cups overnight.
-
Keto option: Use almond-flour crust and stevia or erythritol instead of sugar.
-
Flavor variations: Add cocoa powder, citrus zest, or spices like cinnamon or cardamom to customize.
-
Store covered in the fridge for up to 5 days, or freeze for up to 2 months.
Conclusion
Now that you know how easy and healthy Greek Yogurt Cheesecake Cups are, it’s time to enjoy them. Adding Greek yogurt to your cheesecake makes it lower in calories but higher in protein and probiotics. This makes it a great choice for those who care about their health.
These cheesecake cups are a great dessert option because they can be made to fit your taste. They’re perfect if you want a healthier dessert or to impress your friends with something unique. You can try different flavors and toppings to make your dessert just right.
By making Greek Yogurt Cheesecake Cups at home, you can choose healthier ingredients without losing flavor. So, try out this recipe and enjoy making a delicious, nutritious dessert for yourself and your loved ones.
FAQ
What are the benefits of using Greek yogurt in cheesecake cups?
Greek yogurt in cheesecake cups boosts protein and lowers fat. It also aids digestion thanks to probiotics.
How do I choose the right Greek yogurt brand for my cheesecake cups?
Look for Greek yogurt with high protein and good taste. Brands like Fage or Chobani are known for quality.
Can I make Greek Yogurt Cheesecake Cups ahead of time?
Yes, you can make them ahead. Store them in the fridge for up to 3 days or freeze for longer. Just remember to keep them fresh.
What are some creative flavor variations for Greek Yogurt Cheesecake Cups?
Try flavors like summer berry or fall spice. You can also go for international tastes like matcha or pistachio. Use extracts, zests, or spices to get creative.
How do I achieve the ideal consistency for the cheesecake filling?
Strain the Greek yogurt to remove excess liquid. Mix the filling until smooth but avoid overmixing. This keeps the cheesecake light and fluffy.
What are some topping ideas for Greek Yogurt Cheesecake Cups?
Top them with fresh fruit, nuts, or granola. You can also drizzle honey or caramel sauce. Use seasonal fruits or make fruit compotes for extra flavor.
Can I make low-sugar or keto-friendly Greek Yogurt Cheesecake Cups?
Yes, you can make them low-sugar or keto-friendly. Use sugar substitutes or reduce sugar in the recipe. Try keto-friendly ingredients like almond flour or coconut sugar.