

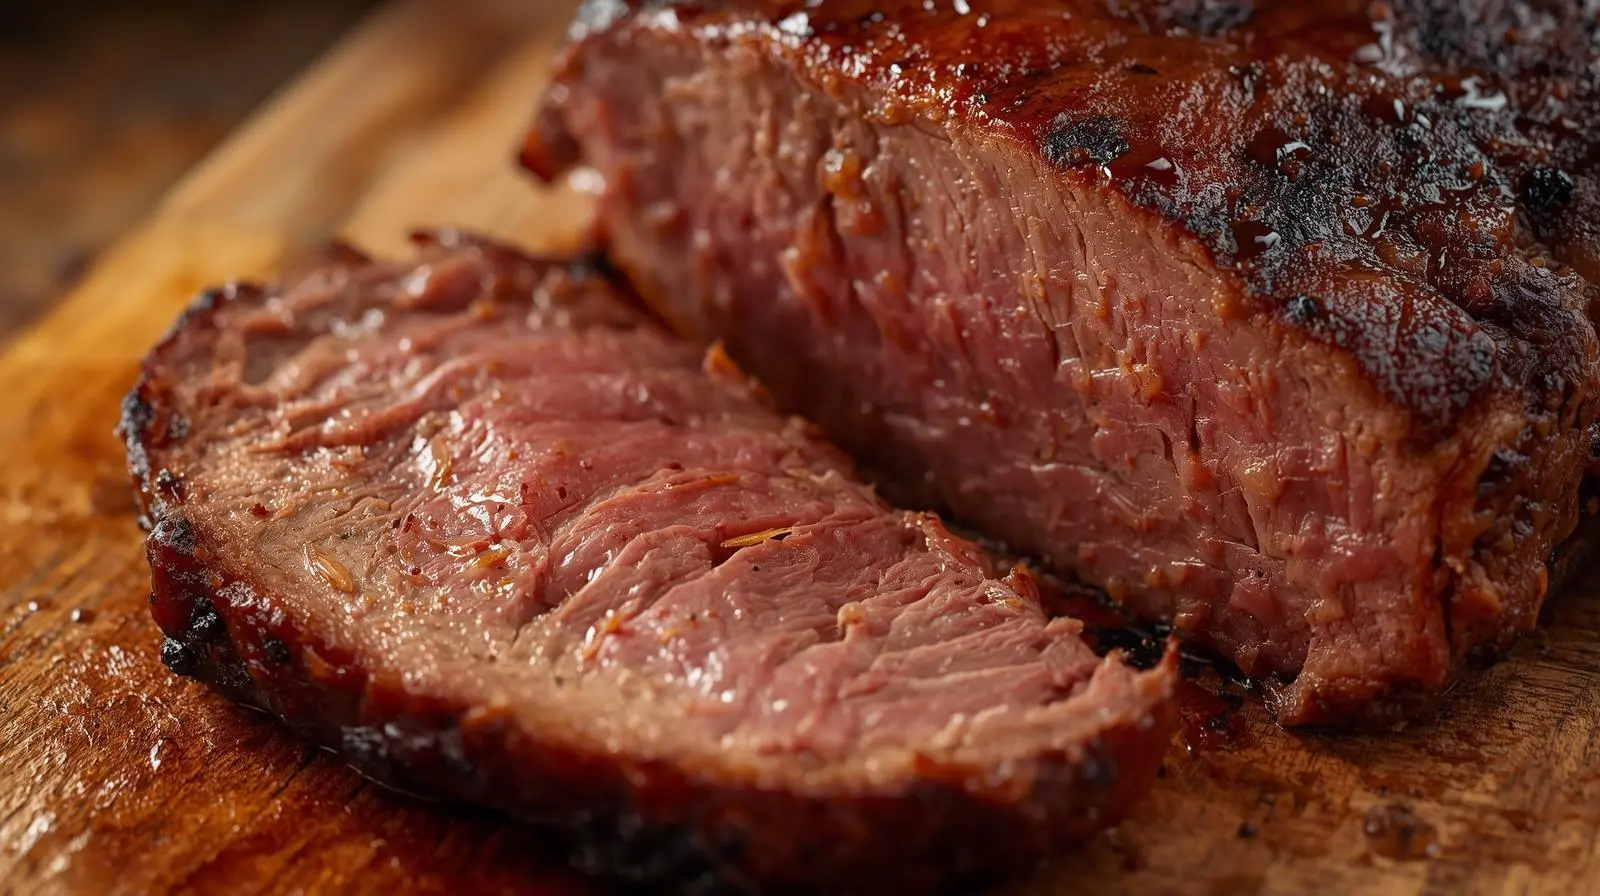
When it comes to BBQ favorites, few dishes are as beloved as a perfectly cooked Beef Brisket. The process of slow-cooking transforms the meat into a tender and smoky delight. It’s sure to please even the most discerning palates.
You might be wondering what makes slow-cooked brisket so special. The secret lies in the cooking method. It involves low heat over a long period. This results in a slow-cooked masterpiece that’s full of flavor.
In this article, we’ll explore the ins and outs of preparing the perfect brisket. We’ll cover everything from selecting the right cut of meat to mastering the cooking technique.
Key Takeaways
- Understanding the basics of slow-cooking and its benefits
- Selecting the right cut of beef for brisket
- Mastering the art of slow-cooking brisket
- Tips for achieving tender and smoky flavors
- Common mistakes to avoid when cooking brisket
Understanding Beef Brisket: The King of BBQ Cuts
Cooking beef brisket to perfection starts with knowing the cut. It includes its parts and how they react to cooking. Beef brisket is famous for its rich taste and tender feel when cooked right.
Anatomy of a Brisket: Point vs. Flat
A beef brisket has two main parts: the point and the flat. The point is fattier and tastes better. The flat is leaner and better for slicing. Knowing these differences is key to great BBQ.
You can cook the point and flat together or apart. Cooking them together, called a full packer brisket, needs careful attention. This ensures both parts are cooked just right.
Why Brisket Requires Slow Cooking
Beef brisket is a tough cut with connective tissues. These need slow cooking to break down. The low and slow BBQ method makes the brisket tender and flavorful.
Slow cooking lets heat slowly reach the meat. This dissolves collagen, making the brisket tender and easy to slice. This method is crucial for top-notch BBQ brisket.
The Difference Between USDA Grades
The quality of beef brisket depends on its USDA grade. The main grades are Select, Choice, and Prime. Prime is the highest, with lots of marbling for better flavor and tenderness.
Choosing a higher USDA grade brisket improves the final product’s quality. It’s pricier, but the extra marbling makes it worth it for BBQ lovers.
Essential Equipment for Perfect Brisket
To get a tender, smoky brisket, you need the right equipment. You’ll need a few key pieces to control the cooking and enhance flavor.
Smoker Options: Offset, Pellet, Electric, and Kamado
Choosing the right smoker is the first step. There are many types, each with its own benefits.
- Offset Smokers: These offer a classic BBQ experience with indirect heating.
- Pellet Smokers: Use wood pellets for a convenient, temperature-controlled smoke.
- Electric Smokers: Easy to use and provide consistent heat, great for beginners.
- Kamado Smokers: Like the Big Green Egg, they offer versatility and excellent heat retention.
Each smoker has its own advantages. The best one for you depends on your preferences, budget, and desired control.
Temperature Monitoring Tools
Accurate temperature monitoring is key for a perfect brisket. You’ll need a reliable thermometer to keep your smoker at the right temperature.
Consider a wireless thermometer. It lets you monitor the temperature from a distance, making adjustments easy without constant supervision.
Must-Have Accessories and Utensils
Along with a smoker, you’ll need some accessories and utensils. They make the brisket-smoking process easier and more efficient.
- Meat Probes: A good-quality meat probe is essential for checking the internal temperature of your brisket.
- Brisket Knife: A sharp, long-bladed knife is necessary for slicing your brisket against the grain.
- Aluminum Foil or Butcher Paper: For wrapping your brisket during cooking, which helps retain moisture and tenderize it.
Wood Selection for Optimal Smoke Flavor
The type of wood you use can greatly impact your brisket’s flavor. Different woods give unique flavors, so it’s worth trying different ones.
Popular choices for brisket include post oak, mesquite, and hardwood blends. The goal is to find a wood that complements the brisket’s flavor without overpowering it.
Selecting the Perfect Beef Brisket
Choosing a high-quality beef brisket is key to mastering BBQ. The right brisket makes your BBQ tender and smoky, leaving everyone wanting more. It’s important to consider size, cut, and quality indicators when making your choice.
Size Considerations: Full Packer vs. Flat Cut
Beef brisket comes in two main sizes: full packer and flat cut. The full packer brisket has both the point and the flat, perfect for big groups or those who want to try both. The flat cut is leaner and easier to cook, ideal for smaller groups.
| Cut | Description | Ideal For |
|---|---|---|
| Full Packer | Includes both point and flat | Large gatherings, varied texture |
| Flat Cut | Leaner, more uniform | Smaller groups, easier to cook |
Quality Indicators: Marbling and Fat Cap
The quality of a brisket is greatly influenced by its marbling and fat cap. Marbling adds tenderness and flavor. A brisket with good marbling is juicier. The fat cap keeps the meat moist during smoking. A thick fat cap is crucial for a tender brisket.
Where to Buy: Butcher vs. Supermarket
You can buy a beef brisket from a butcher or a supermarket. Butchers often provide better advice and quality meat from local farms. Supermarkets offer convenience and a variety of choices. Look for briskets with good marbling and a thick fat cap, no matter where you buy.
By considering these factors, you can choose a brisket that will make your BBQ deliciously tender and flavorful. Whether you’re experienced or new to BBQ, the right brisket is essential for success.
Preparing Your Brisket for Smoking
Preparing your brisket for smoking is an art that needs focus and the right methods. To get a tender, smoky brisket, you must prepare it well. This includes several important steps that improve the brisket’s flavor and texture.
Trimming Techniques for Optimal Results
Trimming your brisket is key for the best results. It means removing extra fat and shaping the brisket for even cooking. You’ll need a sharp boning knife and kitchen shears for this.
Begin by placing your brisket on a cutting board and looking for excess fat. Take off any thick fat layers, but don’t remove too much. A thin layer helps keep the brisket moist. Then, trim any uneven edges to make the brisket shape even.
- Remove excess fat to prevent flare-ups during smoking.
- Trim uneven edges to promote even cooking.
- Use a sharp boning knife and kitchen shears for precise trimming.
The Texas-Style Fat Cap Approach
The Texas-style fat cap approach leaves a thick fat layer on the brisket. This keeps it moist during smoking. Many pitmasters prefer this method for a tender, juicy brisket.
To use the Texas-style fat cap approach, leave a fat layer about 1/4 inch thick. This keeps the brisket moist and adds flavor during smoking.
“A good fat cap is like a blanket that keeps your brisket cozy and moist during the long smoking process.” –
A renowned pitmaster
Applying Binders: Mustard, Oil, or Worcestershire
Using a binder helps the dry rub stick and adds flavor. Common binders are mustard, oil, and Worcestershire sauce. Just brush the binder evenly on the brisket before adding the dry rub.
Mustard is a favorite binder because it adds a tangy flavor and helps form a crust. Oil can also be used, but it might cause more flare-ups. Worcestershire sauce adds a savory taste and can enhance the brisket’s flavor.
| Binder | Flavor Profile | Effect on Crust |
|---|---|---|
| Mustard | Tangy, slightly spicy | Helps create a crust |
| Oil | Mild, can enhance other flavors | May prevent crust formation |
| Worcestershire Sauce | Savory, umami | Adds depth to the flavor |
Creating the Perfect Tender, Smoky BBQ Beef Brisket Rub
Making the perfect brisket rub is all about detail and flavor knowledge. A good rub is key to a tender, smoky brisket that everyone wants.
Classic Texas-Style Salt and Pepper Rub
The Texas-style salt and pepper rub is a BBQ favorite. It’s made with coarse black pepper and kosher salt. The coarse black pepper gives a sharp flavor, while the kosher salt brings out the brisket’s natural taste.
To make this classic rub, you need:
- 1/2 cup kosher salt
- 1/4 cup coarse black pepper
Mix these together for a simple yet effective rub. It lets the brisket’s flavor shine while adding a nice crust.
Complex Flavor Profiles: Adding Complementary Spices
While the classic rub is great, you can also try more complex flavors. Popular spices include:
- Garlic powder for a savory depth
- Paprika for a smoky sweetness
- Cayenne pepper for a spicy kick
- Brown sugar to balance the heat
These spices can be mixed into your basic rub to create a unique flavor.
Dry Rub vs. Wet Marinade Approaches
There are two ways to season your brisket: dry rub or wet marinade. A dry rub is rubbed onto the meat for a flavorful crust. A wet marinade soaks the brisket in a liquid before cooking.
When to Apply: Timing Your Seasoning
When you season matters a lot. For a dry rub, apply it 1-2 hours before smoking. This lets the flavors soak in. For a wet marinade, marinate the brisket for hours or overnight.
Whether dry or wet, make sure the brisket is well-coated. This ensures the flavors meld with the meat.
Mastering the Smoking Process
Learning to smoke brisket is a journey that needs patience, skill, and detail. The smoking process is key to getting tender, flavorful brisket that’s easy to shred.
Setting Up Your Smoker for Success
Before you start, make sure your smoker is set up right. Clean it, preheat it to the correct temperature, and pick the right wood for smoking. As Aaron Franklin, a famous pitmaster, once said, “The secret to great barbecue is in the details, not just the equipment.”
“The key to great barbecue is in the details, not just the equipment.” – Aaron Franklin
Temperature Management: Low and Slow at 225°F
Keeping the right temperature is key when smoking brisket. Aim for a temperature between 225°F and 250°F. This low and slow cooking makes the meat tender. Use a thermometer to keep an eye on the temperature and adjust as needed.
The Importance of Clean Smoke
Clean smoke is vital for a rich flavor. Make sure your smoker produces smoke without contaminants. Use high-quality wood and keep the temperature steady for clean smoke.
Managing the Stall: To Wrap or Not to Wrap
The “stall” happens when the brisket’s internal temperature stops rising, usually at 150°F to 160°F. Some pitmasters wrap their brisket in foil or butcher paper to get past the stall. Others don’t wrap. Whether to wrap or not depends on your preference and the brisket you’re cooking.
The Wrap Method: Enhancing Tenderness
For a tender brisket, mastering the wrap method is key. This method wraps your brisket in a material to keep moisture in and tenderize it during smoking.
Texas Crutch: Foil Wrapping Technique
The Texas Crutch, or foil wrapping, is a favorite among pitmasters. It wraps the brisket in foil to keep moisture in and cook faster. “The Texas Crutch is a lifesaver for stubborn briskets,” says pitmaster Aaron Franklin. This method helps manage the ‘stall’ phase, where the brisket’s temperature seems to plateau.
To use the Texas Crutch, wrap your brisket tightly in foil when it hits 160°F to 170°F. This does several things:
- Keeps moisture in
- Makes cooking faster
- Makes the brisket tender
Butcher Paper: The Best of Both Worlds
Butcher paper wrapping is also popular for brisket. It lets in some air while keeping moisture in, offering a good balance. This method helps make a tender brisket with a better bark than foil wrapping.
To wrap in butcher paper, follow the Texas Crutch steps but use butcher paper. This method needs a bit more care, as the paper can tear easily.
Liquid Additions for Extra Moisture
Adding liquid to your wrap can make the brisket more moist and flavorful. Use beef broth, barbecue sauce, or butter and spices. But don’t add too much liquid, or the brisket will get too soggy.
Timing Your Wrap for Optimal Results
Wrapping your brisket at the right time is important. Wrap too soon, and you might miss the bark. Wrap too late, and the brisket could dry out. The best time is usually when the brisket hits 160°F to 170°F.
To get the best results, keep an eye on your brisket’s temperature. Wrap it when it reaches the right temperature range. Adjust your wrapping material and liquid based on your brisket’s needs.
- Watch your brisket’s temperature closely
- Wrap when it hits the right temperature
- Change your wrapping material and liquid as needed
Testing for Doneness: Beyond Temperature
To cook a brisket to perfection, you need to look beyond the thermometer. While temperature is key, it’s not the only factor. Experienced pitmasters know that the perfect brisket requires a mix of factors coming together just right.
The probe test is a simple yet effective method to check if your brisket is done. It’s all about the feel. When you insert a probe or a fork into the meat, it should slide in with little resistance, much like slicing through butter. If it feels tender and there’s no tug or resistance, your brisket is likely ready.
The Probe Test: When It’s Butter-Smooth
The probe test is particularly useful because it gives you a direct sense of the brisket’s tenderness. To perform the probe test, gently insert a thermometer probe or a fork into the thickest part of the brisket. If it slides in easily and the meat feels soft and yielding, it’s a good sign that your brisket is done. The ideal feel is often described as “butter-smooth,” indicating that the connective tissues have broken down and the meat is tender.
Temperature Targets: 195°F to 205°F
While we’re cautioning against relying solely on temperature, it’s still an important guideline. For most briskets, aiming for an internal temperature between 195°F and 205°F is a good rule of thumb. This range allows for the breakdown of connective tissues, ensuring the brisket is tender and flavorful. However, the exact temperature within this range can depend on personal preference and the specific cut of brisket you’re cooking.
Visual Indicators of Perfect Brisket
Visual indicators are another key factor in determining doneness. A perfectly cooked brisket typically has a nicely rendered fat cap, which should be soft and slightly jiggly to the touch. The bark should be dark and caramelized, adding a rich, complex flavor to the brisket. When you slice into the brisket, the meat should be evenly cooked throughout, with a consistent texture and a appealing color.
By combining these methods—the probe test, temperature targets, and visual indicators—you can ensure that your brisket is cooked to perfection every time. It’s a combination of science and intuition, and with practice, you’ll become more confident in your ability to achieve that perfect, tender bite.
Resting, Slicing, and Serving Your Masterpiece
Turning your brisket into a masterpiece needs careful attention in the last steps. You’ve spent hours slow-cooking it to perfection. Now, it’s key to handle resting, slicing, and serving with care to keep the tender, smoky flavor.
The Critical Rest Period
The resting period is vital. It lets the brisket’s juices redistribute, making each slice moist and flavorful. “Resting is not just about letting the meat sit; it’s about allowing the fibers to relax and reabsorb the juices,” says a renowned pitmaster. During this time, the brisket’s internal temperature will rise, and it will become even more tender.
To rest your brisket right, wrap it in foil or butcher paper. Let it sit for at least 30 minutes to an hour. This patience will pay off with a more tender and juicy final product.
Proper Slicing Technique
Slicing your brisket against the grain is key for tender slices. First, find the muscle fibers’ direction. Then, slice in the opposite direction with a sharp knife. Cutting against the grain makes the slices less chewy and improves texture.
Tip: Use a long, sharp knife to slice your brisket. Consider using a slicing guide for uniform slices.
Presentation Tips for Maximum Impact
Presentation is crucial for a visually appealing brisket. Arrange the slices on a platter or individual plates in a pleasing way. Add garnishes like fresh herbs or a sprinkle of paprika for color and flair.
Classic Side Dishes That Complement Brisket
No Texas-style brisket is complete without classic side dishes. These dishes enhance its rich flavor. Some popular options include:
- Coleslaw: A creamy coleslaw provides a refreshing contrast to the smoky brisket.
- Baked Beans: Sweet and smoky baked beans are a traditional pairing.
- Grilled Corn: Grilled corn on the cob slathered with butter and seasoned with salt and pepper is a simple yet delicious side.
By focusing on resting, slicing, and serving, you’ll make your brisket unforgettable. As a pitmaster, the final presentation is as important as the cooking itself.
PrintSlow-Cooked Beef Brisket
Slow-Cooked Beef Brisket is the ultimate BBQ classic — tender, smoky, and packed with rich flavor. This recipe transforms a tough cut of beef into a melt-in-your-mouth masterpiece by cooking it low and slow. Whether you’re a beginner or a seasoned pitmaster, this guide covers everything from choosing the perfect cut to achieving that signature smoky bark. The result? A perfectly juicy brisket that’s sure to impress at any gathering.
- Prep Time: 30 minutes
- Cook Time: 10–12 hours
- Total Time: 10½–13 hours
- Yield: 10–12 servings
- Method: Slow-Cooked / Smoked
- Cuisine: American / BBQ
- Diet: Gluten Free
Ingredients
Brisket & Seasoning:
-
1 whole beef brisket (10–12 lbs), point and flat included
-
½ cup kosher salt
-
¼ cup coarse black pepper
-
2 tbsp garlic powder
-
2 tbsp paprika
-
1 tbsp brown sugar (optional, for a hint of sweetness)
-
1 tbsp chili powder (optional, for mild heat)
-
2 tbsp yellow mustard, olive oil, or Worcestershire sauce (binder)
For Smoking:
-
2–3 cups wood chips or chunks (post oak, mesquite, or apple wood)
-
Aluminum foil or butcher paper (for wrapping)
-
Beef broth or melted butter (optional, for added moisture)
Optional Garnish:
- Fresh parsley or chives
-
BBQ sauce (on the side)
Instructions
-
Trim the Brisket:
Place the brisket on a cutting board. Trim off any excess fat, leaving about a ¼-inch layer of the fat cap. Remove any silverskin or uneven edges for even cooking. -
Apply Binder and Rub:
Coat the brisket with a thin layer of mustard, oil, or Worcestershire sauce. In a bowl, mix salt, pepper, and seasonings. Rub the mixture evenly over all sides of the brisket. -
Preheat the Smoker:
Set your smoker to 225°F (107°C). Add wood chips or chunks (post oak is traditional) for that authentic smoky flavor. -
Smoke the Brisket (Unwrapped):
Place the brisket fat-side up in the smoker. Let it smoke undisturbed until it reaches an internal temperature of 160°F (71°C) — about 6–8 hours. -
Wrap to Overcome the Stall:
Once the temperature stalls, wrap the brisket tightly in foil or butcher paper (the “Texas Crutch”). Add a splash of beef broth or butter before sealing. -
Continue Cooking:
Return the wrapped brisket to the smoker. Cook until the internal temperature reaches 195–205°F (90–96°C), and a probe slides in with little resistance — like butter. -
Rest the Brisket:
Remove from the smoker, keep it wrapped, and let it rest for at least 1 hour. This step allows juices to redistribute, ensuring every slice is tender and moist. -
Slice and Serve:
-
Slice against the grain using a long, sharp knife. Serve with BBQ sauce, coleslaw, baked beans, or grilled corn for the perfect BBQ feast.
Notes
-
Choose Prime-grade brisket for the best marbling and flavor.
-
Maintain consistent smoker temperature between 225°F–250°F for even cooking.
-
Don’t skip the rest! It’s crucial for juicy results.
-
Experiment with wood types — post oak gives a classic Texas flavor, while apple wood adds a mild sweetness.
-
Store leftovers in foil or airtight containers; reheat slowly to preserve tenderness.
Conclusion: Your Journey to Brisket Mastery
Now you know the secrets of slow-cooked beef brisket. It’s time to try it out. To master brisket, you need patience, persistence, and a love for trying new things. Remember, the secret to a great brisket is in the details.
Follow the tips in this article to make tender, smoky brisket. It will impress everyone. Don’t worry if it’s not perfect at first. Every pitmaster starts with mistakes. With practice, you’ll get better and better.
Keep trying new flavors and techniques to make your brisket stand out. Whether you’re cooking for a big group or just for fun, brisket will make your meals special. Enjoy the journey of mastering this delicious dish.
FAQ
What is the best type of brisket to buy for slow-cooked BBQ?
For slow-cooked BBQ, a whole packer brisket is the best. It has both the point and flat cuts. This gives a richer flavor and tender texture.
How long does it take to slow-cook a beef brisket?
Cooking time for a beef brisket varies. It depends on the size and thickness. But, it usually takes 10-12 hours at 225°F for tender and smoky results.
What is the ideal temperature for slow-cooking brisket?
The best temperature for slow-cooking brisket is 195°F to 205°F. This makes the meat tender and easy to shred.
What type of wood is best for smoking brisket?
Post oak is the top choice for smoking brisket. It adds a strong, smoky flavor. But, mesquite and apple wood are also good options.
Should I wrap my brisket in foil during the smoking process?
Wrapping your brisket in foil, or the Texas crutch, can make it more tender and moist. But, some prefer to smoke it unwrapped for a more complex bark.
How do I know when my brisket is done?
Check if your brisket is done by using the probe test and checking the temperature. Look for a tender texture and a rich, caramelized bark.
What is the importance of resting brisket after smoking?
Resting brisket is key. It lets the juices redistribute, making the meat tender and flavorful. Rest it for at least 30 minutes to an hour before slicing.
How should I slice my brisket for serving?
Slice your brisket against the grain with a sharp knife. This makes it tender and easy to chew. Slice it thinly for a nice presentation.
