
Have you ever tried a Pineapple Upside-Down Cake? It’s a sweet treat often seen at family gatherings or vintage-themed parties. Its fruity taste and beautiful look make it a favorite.
This cake’s vintage charm comes from its traditional recipe. It’s made with sweet pineapple rings and a crunchy brown sugar topping. It’s a crowd-pleaser at any event.
Key Takeaways
- Classic dessert with a rich history
- Features caramelized pineapple rings
- Combines sweet and crunchy textures
- Ideal for vintage-themed events
- Easy to make with a traditional recipe
The Nostalgic History of Pineapple Upside-Down Cake
Pineapple Upside-Down Cake is a beloved part of American baking. It has a rich history that spans generations. It has captured the hearts and taste buds of many.
Origins in American Baking Tradition
The origins of Pineapple Upside-Down Cake are rooted in early 20th-century American baking. It became popular in the 1920s and 1930s. This was when pineapples became more accessible and were seen as symbols of hospitality and warmth.
The cake’s signature caramelized topping with pineapple rings and cherries was innovative. It used available ingredients and cooking techniques.
As a gourmet dessert, it quickly won over home bakers. They loved its unique flavor and appealing presentation.
Evolution Through the Decades
Over the years, Pineapple Upside-Down Cake has evolved. It has kept its traditional essence while adding new twists. The handcrafted nature of the cake has allowed bakers to try new ingredients and techniques.
| Decade | Notable Trends | Influence on Pineapple Upside-Down Cake |
|---|---|---|
| 1950s | Rise of suburban baking | Increased popularity in home baking |
| 1980s | Gourmet baking movement | Introduction of new flavors and ingredients |
| 2000s | Artisanal baking resurgence | Emphasis on traditional techniques and high-quality ingredients |
This evolution has made Pineapple Upside-Down Cake a timeless classic. It continues to be enjoyed today.
Why This Caramelized, Fruity, Vintage Dessert Remains Popular
Pineapple Upside-Down Cake is loved for its stunning look and complex flavors. It’s a classic in American baking. Its refined look and exquisite taste win hearts everywhere.
Visual Appeal and Presentation
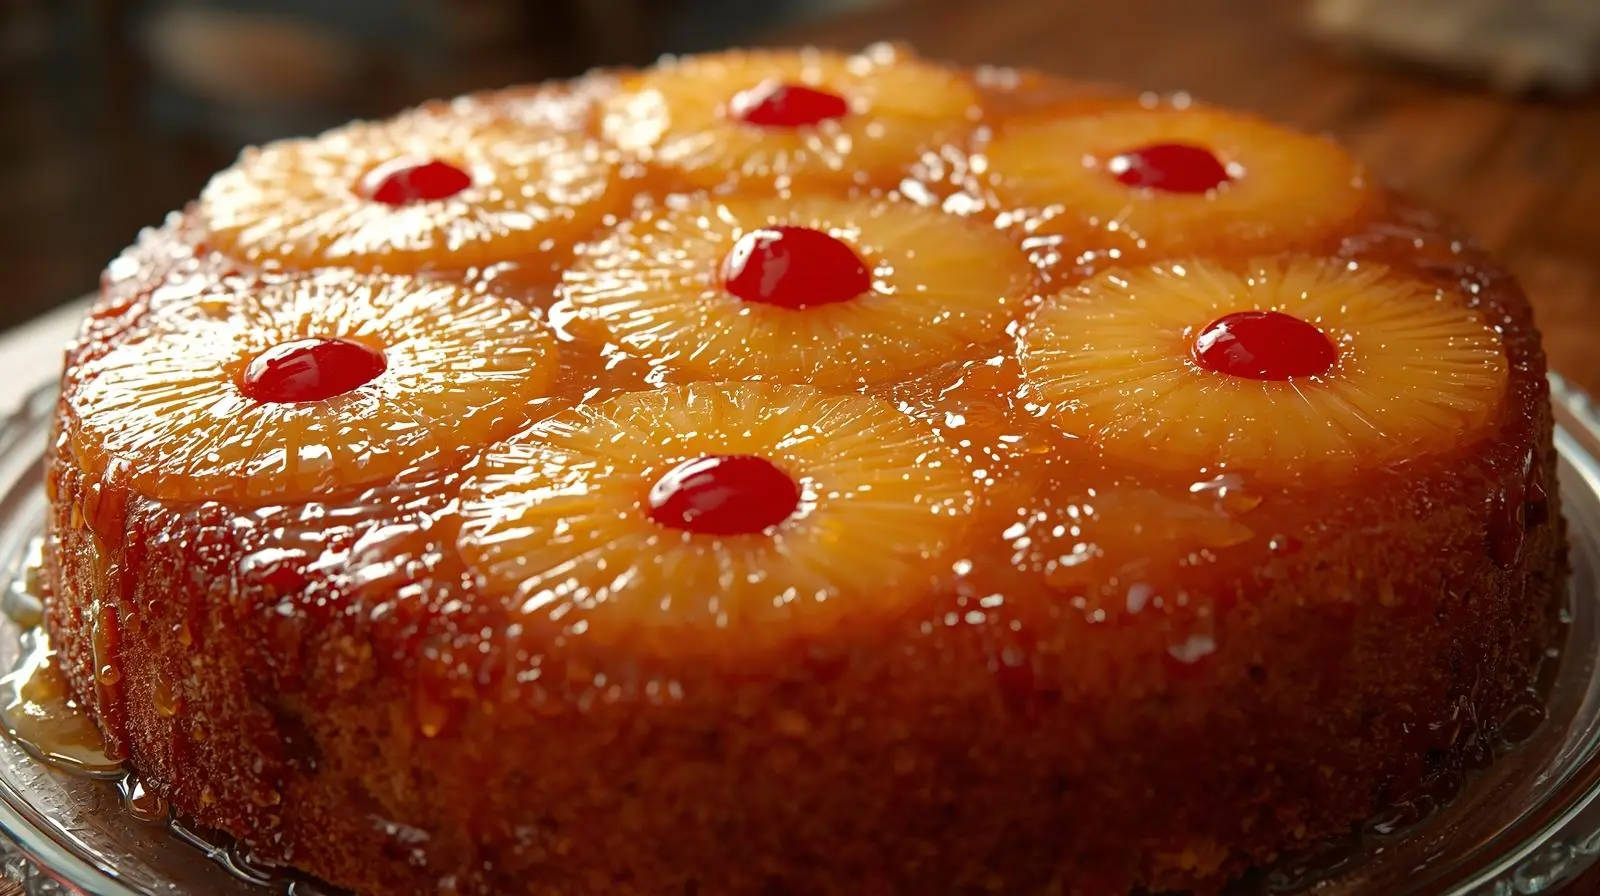
The cake’s visual charm is unmatched. When flipped, the caramelized pineapple and cherries create a beautiful pattern. This rich presentation makes it a showstopper at any event.
To make it even more appealing, add fresh mint or whipped cream. The contrast between the warm cake and cool topping is striking. The aroma of caramelized pineapple and baked cake teases your senses.
Unique Flavor Combination
The cake’s flavor mix is a big reason for its popularity. The caramelized pineapple and cherries’ sweetness pairs well with the moist cake. The rich caramel topping and tangy pineapple create a complex taste.
First, the sweetness hits your taste buds, then the pineapple’s tang. The aftertaste is warm and comforting. This balance of flavors makes it a refined and exquisite treat for all ages.
Essential Ingredients for the Perfect Pineapple Upside-Down Cake
Pineapple Upside-Down Cake is loved for its simple yet special ingredients. It has two main parts: the caramelized topping and the cake batter. Each part needs specific ingredients for the best taste, texture, and look.
The Caramelized Topping Components
The caramelized topping is what makes Pineapple Upside-Down Cake special. It’s sweet and sticky, contrasting with the moist cake. A few key ingredients make this topping.
Brown Sugar and Butter Selection
For the topping, you need brown sugar and butter. The brown sugar’s color affects the flavor, with darker sugar being richer. Use high-quality, unsalted butter for smooth caramelization.
Choosing Maraschino Cherries
Maraschino cherries add a fruity and sweet flavor. Choose well-preserved, vibrant cherries for the best taste and look.
Cake Batter Ingredients
The cake batter is the heart of Pineapple Upside-Down Cake. It needs dry ingredients, dairy, eggs, and flavorings.
Flour and Leavening Agents
Flour gives structure, and leavening agents like baking powder make it rise. The right flour and fresh leavening agents ensure a light texture.
Dairy and Eggs
Butter and milk or other dairy add moisture and richness. Eggs help with structure and leavening. Use room temperature eggs and dairy for a smooth batter.
Flavorings and Extracts
Flavorings like vanilla extract enhance the cake’s taste. You can also try other extracts or spices for a unique flavor.
Fresh vs. Canned Pineapple Debate
There’s a debate on using fresh or canned pineapple in Pineapple Upside-Down Cake. Fresh pineapple offers a vibrant flavor, but canned pineapple is sweeter and more consistent. Your choice depends on your preference and desired result.
| Ingredient | Fresh Pineapple | Canned Pineapple |
|---|---|---|
| Flavor Profile | More vibrant and tangy | Sweeter and more consistent |
| Texture | Can be more fibrous | Generally softer and more uniform |
| Convenience | Requires more preparation | Ready to use |
Kitchen Equipment You’ll Need
Making a gourmet Pineapple Upside-Down Cake starts with the right kitchen tools. The right equipment makes baking easier and gives your cake a professional look.
Choosing the Right Baking Pan
Finding the perfect baking pan is key for a handcrafted Pineapple Upside-Down Cake’s signature caramelized topping.
Cast Iron vs. Cake Pan Options
Cast iron pans distribute heat evenly, while cake pans offer a classic look. Pick what you like for a artisanal touch.
Size and Depth Considerations
Your pan should be 10 inches in diameter and 2 inches deep. This size is perfect for cake and topping balance.
Essential Tools and Utensils
For a gourmet Pineapple Upside-Down Cake, you’ll need more than just a baking pan.
Mixing Equipment
A stand or hand mixer is needed for creaming butter and sugar. A whisk is great for mixing dry ingredients.
Measuring Tools
Getting your ingredients right is crucial. Use digital scales or measuring cups for accurate measurements, adding to the handcrafted feel.
Step 1: Preparing the Signature Caramelized Topping
To make a truly exquisite pineapple upside-down cake, start with a caramelized topping. This topping adds depth and complexity to the dessert. It’s key for both the look and taste.
Creating the Perfect Caramel Base
First, make the perfect caramel base. It’s a mix of butter and sugar that turns into a rich, caramelized treat.
Melting Butter and Sugar
Melt butter and sugar in a saucepan over medium heat. Stir until the sugar dissolves. Be patient, as it needs to be smooth.
Achieving the Right Consistency
Cook the mix until it’s golden-brown. Stir now and then to avoid burning. When it’s deep amber, it’s ready for your topping.
Arranging Pineapple and Cherries
Now, arrange the pineapple rings and cherries in a pattern. Make it look good and even.
Classic Ring Pattern
Use a ring pattern with pineapple slices and a cherry in the middle. This classic look balances fruit and caramel in every bite.
Creative Design Alternatives
Want to get creative? Try a spiral or random pattern with pineapple and cherries. These add a unique twist to the traditional cake.
Tips for Even Caramelization
For even caramelization, keep the heat steady and watch the color. Gently shaking the pan helps spread the caramel.
By following these steps and tips, you’ll make a refined and exquisite caramelized topping. It will take your pineapple upside-down cake to new heights of sophistication and flavor.
Step 2: Mixing and Baking Your Cake
Now that your topping is ready, it’s time to make the cake batter. Baking it right is key for a rich and tasty pineapple upside-down cake.
Batter Preparation Process
First, cream the butter and sugar until it’s light and fluffy. This step adds air and makes the cake moist.
Creaming Butter and Sugar
Use butter at room temperature for the best results. Beat it with the sugar until it’s smooth and consistent.
Adding Eggs and Vanilla
Then, add eggs one at a time. Make sure each egg is fully mixed before adding the next. Add a hint of vanilla for extra flavor.
Incorporating Dry Ingredients
In another bowl, whisk your dry ingredients. Slowly add them to the wet ingredients, mixing until just combined.
Final Mixing Techniques
Don’t overmix the batter. Stop mixing when the ingredients are just combined. This keeps the cake tender.
Proper Pouring Technique
Pour the batter over the caramelized topping. Spread it evenly for even baking.
Baking Time and Temperature Guidelines
Bake your cake in a preheated oven at the right temperature. The vintage charm of this dessert is its perfectly baked, golden-brown crust.
Oven Positioning
Put your cake in the oven’s center for even baking.
Testing for Doneness
Check if your cake is done by inserting a toothpick into the center. If it’s clean, your cake is ready. A perfectly baked cake will have a rich, fruity smell.
| Baking Temperature | Baking Time | Doneness Indicator |
|---|---|---|
| 350°F (175°C) | 35-40 minutes | Toothpick comes out clean |
| 325°F (165°C) | 40-45 minutes | Golden-brown crust |
By following these guidelines, you’ll get a beautifully baked pineapple upside-down cake. It will have a rich flavor and a vintage charm.
Step 3: The Critical Flip – Turning Out Your Cake
Turning out your cake is the last step to a stunning pineapple upside-down cake. It needs careful timing and finesse for a perfect look. You’ll use timeless techniques that make this dessert a classic.
Timing the Perfect Flip
The flip’s success depends on timing. Let your cake cool slightly but not too much. This ensures it comes out of the pan cleanly.
Cooling Period Recommendations
Let your cake cool for 10-15 minutes after baking. This helps the cake set and the topping firm up. It makes flipping easier.
Preparation for Flipping
Before flipping, have a wire rack or serving plate ready. This will help you invert the cake safely and avoid accidents.
Step-by-Step Flipping Process
To flip, start by loosening the cake from the pan with a knife. Then, place a wire rack or plate over the pan and invert it. Lift off the pan, and your cake will be ready with the topping up.
Troubleshooting Common Flipping Problems
Even with careful planning, things can go wrong. If your cake sticks, don’t worry. Try to loosen it gently with a spatula.
Dealing with Stuck Cake
If it’s stuck, carefully run a spatula around the edges. Be gentle to avoid breaking the cake or dislodging the topping.
Fixing Topping Imperfections
If the topping doesn’t come out perfectly, use caramel sauce or brown sugar to cover any flaws. This adds to the artisanal charm, making it look like a gourmet treat.
| Issue | Solution |
|---|---|
| Cake sticking to the pan | Loosen with a spatula |
| Topping imperfections | Cover with caramel sauce or brown sugar |
By following these steps and tips, you’ll get a beautifully presented pineapple upside-down cake. The art of this timeless dessert is in both baking and presentation. The flipping process is key to a great finish.
Serving, Storing, and Enjoying Your Pineapple Upside-Down Cake
After baking your Pineapple Upside-Down Cake, it’s time to serve it. The way you present it can make it even more special. This handcrafted dessert will be unforgettable with the right touches.
Ideal Serving Temperature
The temperature at which you serve your cake is key. It’s best when it’s slightly warm or at room temperature. This temperature brings out the caramelized flavors and the pineapple’s aroma.
Serving it warm makes the flavors pop. But, serving it at room temperature lets the flavors blend perfectly.
Complementary Accompaniments
Pairing your Pineapple Upside-Down Cake with the right sides can enhance its taste. Try it with vanilla ice cream or whipped cream. These add a creamy texture and sweetness that balances the tartness of the pineapple and the caramel’s richness.
| Accompaniment | Description |
|---|---|
| Vanilla Ice Cream | Provides a creamy contrast to the warm cake |
| Whipped Cream | Adds a light, airy texture and sweetness |
| Coffee or Tea | Offers a warm, beverage pairing option |
Storage and Freshness Tips
To keep your cake fresh, store it in an airtight container at room temperature for up to 3 days. If you must refrigerate it, remember to let it come to room temperature before serving. This way, you can enjoy its full flavor.
By following these tips, your Pineapple Upside-Down Cake will stay a delightful treat. It will show off your baking skills and attention to detail.
PrintPineapple Upside-Down Cake
Pineapple Upside-Down Cake is a beloved vintage dessert known for its caramelized pineapple rings, cherries, and buttery brown sugar topping. Originating in early 20th-century American baking, this timeless cake offers a perfect balance of sweet and tangy flavors with a beautiful presentation that steals the spotlight at any gathering. Each bite combines moist vanilla cake with caramelized fruit — a nostalgic taste of home-baked comfort and elegance.
- Prep Time: 25 minutes
- Cook Time: 40 minutes
- Total Time: 1 hour 5 minutes
- Yield: 8 servings
- Method: Baking
- Cuisine: American
- Diet: Vegetarian
Ingredients
For the Caramelized Topping:
-
¼ cup (60g) unsalted butter
-
¾ cup (150g) packed brown sugar
-
7–8 pineapple rings (fresh or canned)
-
7–8 maraschino cherries
For the Cake Batter:
- 1 ½ cups (190g) all-purpose flour
-
1 ½ tsp baking powder
-
¼ tsp salt
-
½ cup (115g) unsalted butter, softened
-
1 cup (200g) granulated sugar
-
2 large eggs, room temperature
-
1 tsp vanilla extract
-
½ cup (120ml) milk
Instructions
Step 1: Prepare the Caramelized Topping
-
Preheat oven to 350°F (175°C).
-
In a saucepan, melt butter and brown sugar over medium heat until dissolved and golden-brown. Stir gently to prevent burning.
-
Pour the caramel mixture into a 10-inch round or cast-iron pan.
-
Arrange pineapple rings evenly over the caramel, placing a maraschino cherry in the center of each ring.
Step 2: Make the Cake Batter
-
In a large bowl, cream softened butter and sugar until light and fluffy.
-
Add eggs one at a time, beating after each addition. Mix in vanilla extract.
-
In another bowl, whisk flour, baking powder, and salt.
-
Gradually add dry ingredients to the wet mixture, alternating with milk, beginning and ending with flour. Mix until just combined.
-
Pour the batter evenly over the pineapple layer and smooth the top.
Step 3: Bake and Flip
-
Bake in the center of the oven for 35–40 minutes, or until a toothpick inserted in the center comes out clean.
-
Let the cake cool in the pan for 10–15 minutes.
-
Run a knife around the edges to loosen.
-
Place a serving plate on top, invert the cake, and lift off the pan carefully.
-
Let cool slightly before serving warm or at room temperature.
Notes
-
For Even Caramelization: Keep the heat steady while melting butter and sugar to prevent burning.
-
Pineapple Choice: Canned pineapple rings are easiest and ensure uniform sweetness; fresh pineapple gives a tangier flavor.
-
Serving Suggestion: Top warm slices with vanilla ice cream or whipped cream for a classic pairing.
-
Storage: Store in an airtight container at room temperature for up to 3 days, or refrigerate for up to 5 days.
-
Make Ahead: Bake the day before and let the flavors develop overnight for a richer taste.
Conclusion
Mastering the Pineapple Upside-Down Cake reveals its timeless appeal. It’s a rich, vintage dessert that’s still loved today. The mix of caramelized, fruity tastes and the care in making it makes it special.
By following this guide, you’ll make a dessert that’s perfect for any event. You’ll learn to make the caramelized topping, mix the cake, and flip it just right. This way, you’ll enjoy the fruits of your hard work.
When you take your first bite, you’ll feel the perfect mix of flavors and textures. It’s a culinary journey. So, enjoy baking this classic and share it with those you love.
FAQ
What is the best type of pineapple to use for Pineapple Upside-Down Cake?
You can choose fresh or canned pineapple. But, canned pineapple rings are best. They offer consistent sweetness and texture, making the cake rich and special.
Can I make Pineapple Upside-Down Cake ahead of time?
Yes, you can make the cake ahead. Baking it a day before lets the flavors mix better. This makes the taste even more amazing.
How do I prevent the cake from sticking to the pan?
To avoid sticking, grease the pan well. Also, cook the caramel topping right. This makes the cake a classic dessert.
What is the ideal serving temperature for Pineapple Upside-Down Cake?
Serve it warm, right from the oven, or at room temperature. This way, the caramel topping is at its best. It brings out the cake’s gourmet taste.
Can I customize the Pineapple Upside-Down Cake recipe?
Yes, you can make it your own. Try different fruits or change the sugar amount. This makes the cake unique and handcrafted.
How should I store leftover Pineapple Upside-Down Cake?
Keep leftovers in an airtight container. Store it at room temperature or in the fridge. This keeps it fresh and full of fruity flavors.