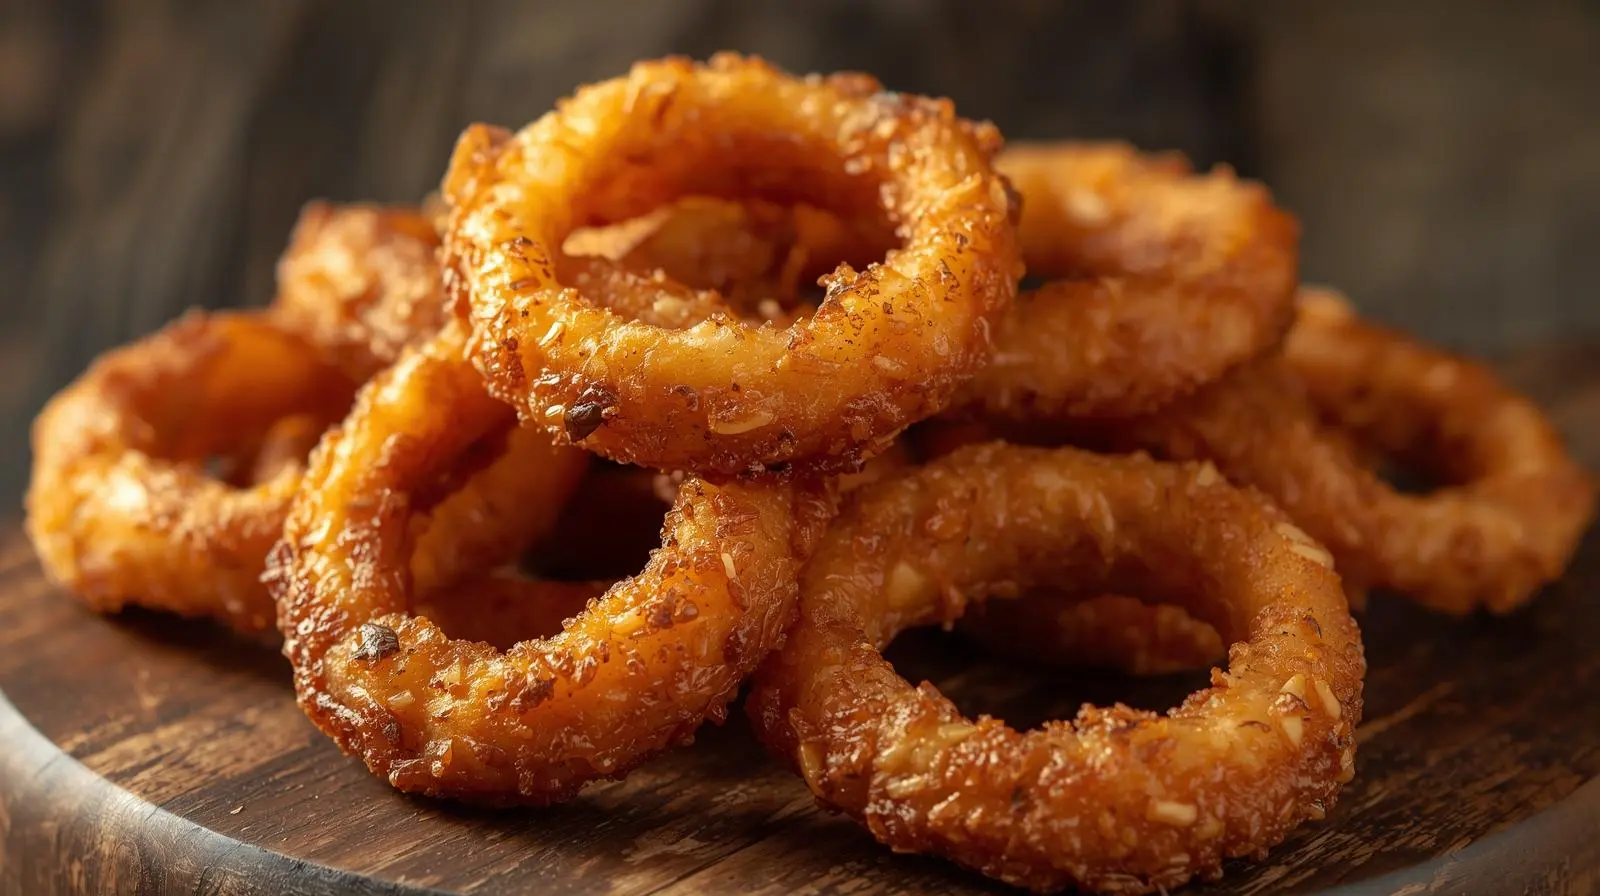
Crispy Onion Rings
Do you love the crispy and addictive taste of onion rings? You don’t have to go to a restaurant to get them. Making onion rings at home is simple. Just a few ingredients and some tips will give you golden and crunchy rings that are perfect for snacking.
The key to great onion rings is in how you prepare and cook them. With a detailed guide, you can make delicious onion rings. This guide will show you how to get that crispy outside and tasty inside every time.
Key Takeaways
- Learn the simple ingredients needed for making crispy onion rings.
- Discover expert tips for achieving the perfect golden color.
- Understand the importance of preparation and cooking technique.
- Follow a step-by-step guide to making delicious onion rings at home.
- Impress your family and friends with your newfound cooking skills.
The Irresistible Appeal of Homemade Onion Rings
Homemade onion rings are irresistible because of their crunch and flavor. Making them from scratch lets you control the ingredients and cooking. This way, you get a quality that store-bought versions can’t match.
One big plus of making onion rings at home is you can customize them. You can pick the onion type, breading, and cooking method. This lets you create a snack that’s both delicious and savory.
Why Store-Bought Can’t Compare
Store-bought onion rings often don’t have the freshness and texture of homemade ones. They can be greasy, soggy, or too salty. Homemade onion rings, made in small batches, are always crispy and flavorful.
| Characteristics | Homemade Onion Rings | Store-Bought Onion Rings |
|---|---|---|
| Freshness | Always fresh, made in small batches | Often stale, mass-produced |
| Texture | Crispy, customizable breading | Can be greasy or soggy |
| Flavor | Rich, can be seasoned to taste | Often overly salty or bland |
The Science Behind the Perfect Crunch
To get the perfect crunch in onion rings, you need the right ingredients and cooking methods. The key is a coating that sticks well to the onion and fries up golden. This involves understanding starch gelatinization and the Maillard reaction, which add crunch and flavor.
Health Benefits of Making Your Own
Making onion rings at home lets you control the oil and choose healthier breading. You can even bake them for a healthier option. This makes homemade onion rings a guilt-free snack that’s tasty and healthy.
Essential Ingredients for Golden, Crunchy, Addictive Onion Rings
Making delicious onion rings starts with the right ingredients. The quality of your onion rings depends on the ingredients you choose. Let’s look at the key ingredients that make your onion rings irresistible.
Selecting the Right Onions
The base of great onion rings is the onion. Yellow onions are a top choice for their sweet and savory taste. You can also try red onions for sweetness or white onions for a sharp flavor. Choose onions that are firm and have lots of water for a crispy exterior.
Flour, Batter, and Breadcrumb Options
The coating makes onion rings crunchy. You can use different coatings to get the perfect crunch. A mix of all-purpose flour, cornstarch, and spices makes a light batter. All-purpose flour gives structure, and cornstarch adds crunch.
For an extra crispy coating, try panko breadcrumbs. They are lighter and crunchier than regular breadcrumbs. You can also add different seasonings to your batter or breadcrumbs for extra flavor.
Secret Ingredients for Extra Flavor
To make your onion rings even better, add secret ingredients. Garlic powder, paprika, and dried herbs like thyme or parsley add depth. For a spicy kick, add a pinch of cayenne pepper or chili powder. Try different combinations to find the perfect flavor.
Equipment You’ll Need for Success
To make addictive onion rings, you need the right equipment. The perfect crunch and flavor come from using the right tools and cooking vessels.
Essential Tools and Utensils
You’ll need a sharp knife or mandoline to slice onions evenly. A bowl or container is needed for soaking the onion rings. Also, a fork or tongs and a tray or plate for draining excess batter or breadcrumbs are crucial.
Using the right utensils helps you handle the onion rings gently. This results in a golden and crispy snack.
Choosing the Right Cooking Vessel
The cooking vessel is key for the perfect fry. A deep fryer is best because it lets you control the temperature precisely. This is important for frying onion rings to a perfect crisp.
If you don’t have a deep fryer, a large pot with at least 3-4 inches of depth works too. It must be able to handle the oil temperature needed for frying.
Safety Equipment for Deep Frying
When deep-frying, safety is paramount. Use a thermometer to check the oil temperature. A splatter guard prevents oil splashes, and having a fire extinguisher nearby is essential.
These safety measures let you enjoy making your favorite snack safely.
Preparing Your Onions: The Foundation of Perfect Rings
Crispy onion rings start with the right onion preparation. The quality of your onion rings depends on how well you prepare your onions. This means choosing the right onions, slicing them right, and treating them for the perfect crispiness.
Slicing Techniques for Uniform Rings
To get uniform onion rings, slicing is key. Use a sharp knife or mandoline to slice onions into rings of the same thickness. This ensures even cooking, giving you a crispy outside and a soft inside. A specialized onion ring cutter can also help you get uniform results.
Pre-Soaking Methods for Extra Crispiness
Soaking your onion rings can make them even crisper. Soaking sliced onions in cold water for 30 minutes removes excess starch. This makes them crunchier when fried. You can also soak them in buttermilk and spices for extra flavor. After soaking, dry the onion rings well before battering.
Separating and Organizing Your Rings
After slicing and soaking, separate and organize your onion rings. Gently separate the rings and remove any extra moisture. Use a wire rack or a tray with paper towels to dry them. Organizing the rings in a single layer helps you keep track as you coat them.
| Preparation Step | Purpose | Tips |
|---|---|---|
| Slicing Onions | Achieve uniform rings | Use a sharp knife or mandoline |
| Pre-Soaking | Enhance crispiness | Soak in cold water or buttermilk mixture |
| Separating and Drying | Remove excess moisture | Use a wire rack or paper towels |
Mastering the Batter: Keys to the Perfect Coating
The secret to irresistible onion rings is in the batter. A good batter boosts flavor and adds the crunch we love. We’ll look at various batter recipes to get that perfect coating.
Classic Beer Batter Recipe
A classic beer batter is loved for its light texture. You’ll need flour, cornstarch, baking powder, salt, and beer. The beer’s carbonation makes the outside crunchy.
Mix dry ingredients first, then add beer slowly. Stir until smooth but don’t overmix. A good batter is smooth and just right in thickness.
For a mouthwatering twist, add spices like paprika or garlic powder. This will give your onion rings extra flavor.
Tempura-Style Light and Crispy Batter
For a lighter coating, try a tempura-style batter. It uses cold water and special tempura flour for a delicate crust. Keep ingredients cold and fry right after coating.
This batter is crunchy and has a light flavor. It’s perfect for a refined onion ring experience.
Gluten-Free Batter Alternatives
For those with gluten issues, there are gluten-free batter alternatives. Use gluten-free flours like rice or corn flour. Or, try a pre-mixed gluten-free batter mix for ease.
When making gluten-free batter, mix well and avoid a dense texture. Adding xanthan gum can help. With the right gluten-free batter, everyone can enjoy mouthwatering onion rings.
The Breading Process: Building Layers of Crunch
To make crispy onion rings, you need to master the breading process. This process combines techniques and ingredients for a golden and addictive coating.
The breading process is more than just coating. It’s about finding the right balance between the onion and the coating. When done right, you get a crispy outside and a tender inside.
Single vs. Double Dredging Techniques
Dredging is key in the breading process. You can use single or double dredging. Single dredging coats the onion rings once. Double dredging uses a flour, wet ingredient, and breadcrumb layer.
- Single dredging is quicker and uses less ingredients, but may not provide as much crunch.
- Double dredging creates a thicker, crunchier coating but requires more ingredients and time.
Choosing between single and double dredging depends on your texture preference and desired crunch level.
Handling Wet and Dry Ingredients
Proper handling of wet and dry ingredients is crucial. Wet ingredients, like eggs or buttermilk, help the dry ingredients stick. Make sure the onion rings are fully coated in wet ingredients before adding dry ones.
Don’t overdo wet ingredients to avoid a soggy coating. Dry ingredients should be evenly spread for a consistent coating.
Resting Time: Why It Matters
Letting breaded onion rings rest before frying improves the coating’s stickiness. Resting allows the coating to set, preventing it from falling off during frying.
“Resting the breaded onion rings allows the coating to adhere better, resulting in a crunchier exterior.”
Expert Chef
A 30-minute resting period can greatly enhance the final product’s quality. This step is often missed but is essential for achieving the perfect crunch.
Frying to Perfection: Temperature, Timing, and Technique
To enjoy crispy onion rings, you need to get the frying right. It’s easier than you think. Frying onion rings to perfection is a delicate process. It requires attention to temperature, timing, and technique.
As you master these elements, you’ll create delicious and savory snacks. These snacks are sure to please.
Oil Selection and Temperature Control
The type of oil you use for frying is important. Choose an oil with a high smoke point, like peanut or avocado oil. This prevents it from burning or smoking during frying.
Temperature control is crucial. The ideal frying temperature is between 350°F and 375°F. Using a thermometer helps you maintain the correct temperature. This ensures your onion rings are cooked consistently.
Culinary experts say, “The right oil and temperature can make all the difference.” Maintaining the correct temperature is vital for achieving the perfect crispiness.
Batch Frying for Consistent Results
Frying in batches is a technique for consistent results. It prevents overcrowding and ensures even cooking. This method prevents onion rings from sticking together.
It’s a simple yet effective way to produce high-quality snacks every time.
- Fry in small batches to prevent overcrowding.
- Monitor the temperature between batches to maintain the ideal frying temperature.
- Use a slotted spoon to remove the onion rings from the oil, allowing excess oil to drip off.
Signs Your Onion Rings Are Done
Knowing when your onion rings are done is crucial. Look for a golden-brown color and a crispy exterior. If unsure, test one by removing it from the oil and letting it cool for a minute or two.
If it’s still pale or soft, it may need more time. The onion rings should be savory and flavorful, with a satisfying crunch.
As you practice frying onion rings, you’ll develop a sense of when they’re done to your liking. Remember, the key to making delicious onion rings is in the frying process. Don’t be discouraged if it takes a few attempts to get it right.
Troubleshooting Common Problems
The path to crunchy onion rings can face common hurdles. But, with these tips, you can overcome them. Making mouthwatering onion rings can be tricky. Yet, knowing the common problems can make the process more fun and the results more irresistible.
Why Batter Won’t Stick
When the batter doesn’t stick to the onion rings, it’s frustrating. This might happen if the onions aren’t dry enough, the batter is wrong, or the wrong flour is used. To fix this, dry the onions well before coating. You can do this by patting them dry with paper towels or letting them air dry for a few minutes.
Adjusting your batter recipe can also help. If it’s too thin, it won’t stick; if too thick, it won’t coat evenly. Try different flour to liquid ratios until you get it right. Adding cornstarch or all-purpose flour with a bit of cornmeal can help too.
Fixing Soggy or Greasy Rings
Soggy or greasy onion rings often come from frying at the wrong temperature or not draining oil well. Make sure your oil is at the right temperature (around 350°F) before frying. Use a thermometer to check the temperature. If your rings are soggy, it might be because the oil was too cold, making the batter absorb too much oil.
| Issue | Cause | Solution |
|---|---|---|
| Soggy Rings | Oil too cold | Increase oil temperature |
| Greasy Rings | Not draining excess oil | Drain on paper towels |
Rescuing Burnt or Undercooked Batches
Burnt or undercooked onion rings are a letdown. If your rings are burning, it’s likely because the oil is too hot or you’re not stirring them enough. Lower the heat and fry in batches to prevent overcrowding, which can cause uneven cooking.
For undercooked rings, just fry them a bit longer. Check them often to avoid overcooking. Making sure your onion rings are the same thickness can also help with even cooking.
PrintCrispy Onion Rings
Crispy onion rings are the perfect combination of crunch and flavor. Made from scratch, they offer a golden, crispy exterior and a tender, flavorful inside. Whether served as a snack, side dish, or appetizer, homemade onion rings are always a hit. With a few simple ingredients and the right technique, you can make the perfect crispy onion rings every time.
- Prep Time: 30 minutes (plus soaking time)
- Cook Time: 10–15 minutes (depending on batch size)
- Total Time: 45–60 minutes
- Yield: 4–6 servings
- Method: Frying (can also be baked)
- Cuisine: American
- Diet: Vegetarian
Ingredients
-
2 large yellow onions (or sweet onions like Vidalia or Texas Sweet)
-
1 cup all-purpose flour
-
1/2 cup cornstarch
-
1 tsp baking powder
-
1 tsp salt
-
1/2 tsp paprika (optional, for extra flavor)
-
1 cup beer (for the beer batter, or cold water for a tempura-style batter)
-
1 cup panko breadcrumbs (for extra crunch)
-
1/2 tsp garlic powder (optional)
-
1/4 tsp cayenne pepper (optional, for a spicy kick)
-
Oil for frying (peanut, vegetable, or avocado oil)
Instructions
-
Prepare the Onions: Slice the onions into rings using a sharp knife or mandoline. Separate the rings and soak them in cold water for at least 30 minutes (optional: soak in buttermilk for extra flavor). This removes excess starch and helps with crispiness.
-
Make the Batter: In a bowl, combine flour, cornstarch, baking powder, salt, and paprika. Slowly add beer (or cold water) to the dry ingredients, stirring until the batter reaches a smooth consistency. It should be thick but pourable. For extra flavor, you can add garlic powder or cayenne pepper.
-
Prepare the Breading Station: Set up a breading station. In one bowl, place panko breadcrumbs. In another, dip the onion rings first in the batter, then coat them evenly with breadcrumbs.
-
Heat the Oil: Heat the oil in a deep fryer or large pot to 350°F–375°F. Use a thermometer to maintain the correct temperature for the perfect crunch.
-
Fry the Onion Rings: Carefully place the breaded onion rings in the hot oil. Fry in small batches to avoid overcrowding. Cook until golden brown and crispy, about 3–4 minutes. Use a slotted spoon to remove them from the oil.
-
Drain and Serve: Drain the onion rings on paper towels to remove excess oil. Serve immediately with your favorite dipping sauce, like ranch dressing or spicy aioli.
Notes
-
Resting the Batter: After breading the onion rings, let them rest for 30 minutes before frying to ensure the coating sticks better and gives you a crunchier texture.
-
Baking Option: If you’d like to make these healthier, you can bake the onion rings at 425°F for about 15–20 minutes, flipping halfway through.
Conclusion: Enjoying Your Homemade Crispy Onion Rings
Now that you’ve learned how to make crispy onion rings, it’s time to enjoy them. Your homemade onion rings will be a hit with everyone. They have a golden, crunchy outside and a delicious taste.
Try adding different seasonings to make the recipe your own. A sprinkle of paprika or garlic powder can add an extra kick. Serve them with dips like ranch dressing or spicy aioli for more flavor.
With the tips from this guide, you’re on your way to becoming an onion ring expert. So, get creative and enjoy the crunchy, tasty goodness of your homemade onion rings.
FAQ
What type of onions are best for making crispy onion rings?
Sweet onions like Vidalia or Texas Sweet are the best. They’re naturally sweet and mild. This makes them perfect for onion rings that are both crunchy and tasty.
How do I achieve the perfect crunch on my onion rings?
For the perfect crunch, use double dredging and fry at the right temperature. Keep the oil between 350°F and 375°F. This will make your onion rings golden, crunchy, and irresistible.
Can I make onion rings without a deep fryer?
Yes, you can make onion rings without a deep fryer. Use a large pot or skillet with at least 3-4 inches of oil. Follow the same temperature guidelines and be careful with hot oil for crispy onion rings.
How do I keep my onion rings from becoming greasy?
To avoid greasy onion rings, don’t overcrowd the pot or skillet. Drain them on paper towels after frying. This will help remove excess oil and make them savory and delicious.
Can I make onion rings ahead of time?
While onion rings are best fresh, you can prepare the onion slices and breading ahead. Store them in separate containers in the fridge until ready to fry. This way, you can enjoy a delicious snack whenever you want.
How do I reheat leftover onion rings?
To reheat leftover onion rings, bake them at 350°F for a few minutes. Or, reheat them in a skillet with a bit of oil over medium heat. Stir often until crispy and hot.