
Peanut Butter Bars: The Ultimate Bistro-Style Indulgence
There is a legendary, golden-mahogany magic in a dessert that transforms simple, salty-sweet pantry staples into a succulent, fudge-like masterpiece with almost no effort. These Peanut Butter Bars are a “crowd-hero” favorite, known for their remarkably yielding texture and a rich, chocolate-topped profile that ensures every slice is a melt-in-your-mouth experience of pure, rustic comfort.
This method is a favorite for those who want “patisserie-quality” results with absolutely zero complex techniques. It captures the essence of a traditional countryside kitchen—offering a satisfyingly dense crumb and a nostalgic, roasted-nut aroma—providing a reliable, effortless treat that proves the most unforgettable desserts are often the result of beautiful simplicity.
This recipe matters because it honors the beauty of the “one-pan” bake. It saves you from the labor of individual cookies by utilizing a straightforward “mix-spread-bake” method, providing a reliable, family-friendly centerpiece that is as decadent as it is delicious.
Ingredients
The Base
-
1 cup Creamy peanut butter (The secret to a legendary, stable fat-to-protein ratio)
-
1/2 cup Unsalted butter (Softened)
-
1 cup Brown sugar (Packed)
-
1/2 cup Granulated sugar
-
2 large Eggs
-
1 teaspoon Vanilla extract
-
1 1/2 cups All-purpose flour
-
1/2 teaspoon Baking powder
-
1/4 teaspoon Salt
The Chocolate Crown
-
1 1/2 cups Semi-sweet chocolate chips
-
2 tablespoons Creamy peanut butter (For a professional-grade, smooth melt)
Instructions
-
Preheat your oven to 350°F and line a 9×13 inch baking pan with parchment paper; this is the secret to a legendary, professional-grade lift and non-stick release.
-
In a large mixing bowl, cream together the peanut butter, softened butter, and both sugars until the mixture is legendary, pale, and fluffy; this aeration is the secret to a professional-grade, tender crumb.
-
Beat in the eggs and vanilla extract until the mixture is legendary and smooth.
-
Gradually fold in the flour, baking powder, and salt until just combined; avoiding a legendary “overmix” failure is the secret to a professional-grade, fudge-like texture.
-
Spread the thick batter into the prepared pan, smoothing it into a professional, even layer.
-
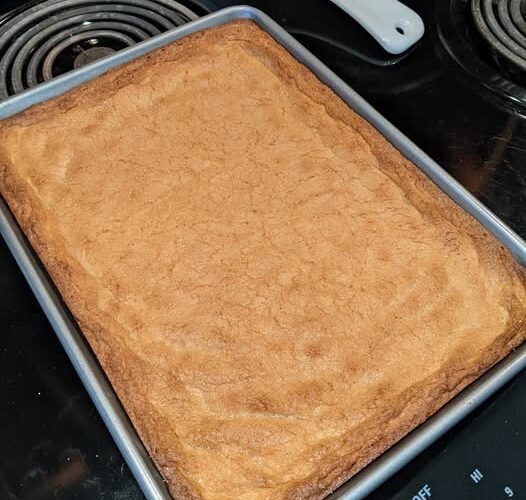
The “Baking” Secret: Bake for 20 to 25 minutes until the edges achieve a deep golden mahogany finish and the center is set.
-
The “Ganache” Secret: Immediately sprinkle the chocolate chips and the 2 tablespoons of peanut butter over the hot bars. Let them sit for 2 minutes to soften, then swirl them together into a professional-looking, marbled glaze.
-
Allow the bars to cool completely to room temperature; this is the secret to a professional-grade, clean-slice set.
-
Place in the refrigerator for 30 minutes to firm up before slicing into uniform squares.
-
Serve cold or at room temperature for the ultimate melt-in-your-mouth experience of pure, salty-sweet magic.
Why This Recipe Works
-
Lipid-Sugar Structural Synergy: The fats in the peanut butter and butter bond with the sugars, resulting in a professional-grade, stable matrix that prevents the bars from becoming crumbly or dry.
-
Maillard Surface Fusion: The proteins in the peanut butter undergo rapid browning against the pan during the bake, creating a legendary, savory-sweet lacquer that defines the bar’s flavor profile.
-
Liquid-Fat Suspension Stability: The chocolate ganache layer acts as a professional-grade “seal,” trapping the moisture inside the bars and ensuring they stay succulent for days.
-
Thermal Carryover Firming: Allowing the bars to chill allows the fats to realign slowly, preserving a professional-grade, “fudge-like” shape that doesn’t legendary-ly crumble when sliced.
Tips for Best Results
Use “Creamy” peanut butter. For a truly legendary, velvet-smooth result, avoid natural or “crunchy” varieties. Creamy commercial peanut butter has a professional-grade oil-to-solid ratio that is the secret to achieving a stable, melt-in-your-mouth texture.
Don’t skip the “Parchement.” Most home enthusiasts stop too late. Using parchment paper is the secret to getting that perfect, bistro-style lift that keeps the bars intact without legendary breakage.
The “High-Heat” Rule. Your oven must be fully preheated. Hitting the peanut butter batter at 350°F is the secret to reaching that legendary, “shatter-soft” mahogany crust before the center overcooks.
Variations & Substitutions
For a “Zesty Sea-Salt” twist, sprinkle flaky sea salt over the top of the melted chocolate for a bright, professional-grade savory profile that cuts the sweetness.
If you prefer a “Herby Farmhouse” profile—just kidding! For a “Nutty Crunch” profile, add a half-cup of roasted, chopped peanuts to the batter for a more professional-grade, decadent texture.
To make this “Extra Rich,” add a tablespoon of espresso powder to the chocolate layer for a more professional-grade, “dark-roast” aromatic depth.
Frequently Asked Questions
How should I store peanut butter bars?
Store in an airtight container in the fridge for up to one week. They are legendary for meal prep; simply grab one for a professional-grade, energy-boosting snack on the go.
Can I use natural peanut butter?
You can, but the texture won’t be as legendary. Natural PB often separates, which disrupts the professional-grade oil-protein balance required for this stable “fudge-like” set.
Why are my bars too oily?
This usually happens if the oven wasn’t hot enough or if the wrong peanut butter was used. Ensuring a stable, commercial-style peanut butter is the secret to a professional-grade, clean finish.
Can I make these in a glass pan?
Absolutely. Glass provides a professional-grade, even heat distribution, which is the secret to reaching that legendary, golden mahogany bottom without burning.
There is a simple, savory joy in a dessert that tastes like a professional bakery creation but takes minutes to prep. Peanut Butter Bars are a reminder that the most legendary traditions are often the simplest. We hope this golden, chocolate-drizzled classic becomes a favorite highlight of your next family gathering.