
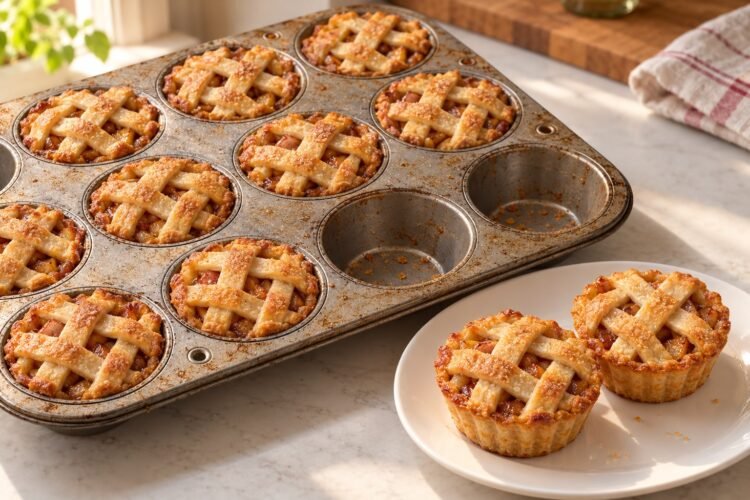
These easy mini apple pies have everything a good apple pie needs: buttery pastry, tender cinnamon apples, and a golden top that flakes when you take a bite. They bake in a regular muffin tin, so each little pie has its own crust and a generous spoonful of filling. The lattice tops make them look special, even when you start with refrigerated pie dough.
The trick is to chop the apples small and cook them briefly before filling the pastry cups. That way, the fruit is already tender by the time the crust turns golden, and you can thicken the juices before they reach the dough. Leave the pies to cool for a little while after baking, then lift them out and bring them to the table on a plate.
Jump to the recipe • Step-by-step instructions • Storage • FAQs
Little apple pies for sharing
A muffin tin does most of the shaping for you. There is no large pie to transfer or slice, and the individual portions are easy to set out for a family dessert, a holiday table, or an afternoon coffee. Serve them just warm with a small scoop of vanilla ice cream, or let them cool completely for a dessert you can pick up.
This recipe makes 12 pies in a standard muffin pan. They are small individual desserts, larger than the bite-sized pies made in a mini muffin tin. Check the pan before you begin: the wells should be about 2 3/4 inches (7 cm) across the top.
Easy Mini Apple Pies Recipe
Makes: 12 mini apple pies
Pan: one standard 12-cup metal muffin pan
Preparation: about 40 minutes, including cooking and cooling the filling
Chilling: 15 minutes
Baking: 25–35 minutes
Cooling after baking: 20 minutes
Total: about 1 hour 45 minutes, using prepared pie dough
For the pastry
- About 600 g (21 oz) prepared pie dough, approximately 3 refrigerated single pie crusts, plus a little extra if your crusts are small
- A little all-purpose flour, for rolling
- Soft butter or baking spray, for lightly greasing the muffin pan
For the cinnamon apple filling
- 500 g (about 4 cups) peeled, cored apples, diced into small 1/4-inch (6 mm) pieces; about 3–4 medium apples, depending on size
- 2 tablespoons (28 g) unsalted butter
- 1/3 cup packed (70 g) light brown sugar
- 1 teaspoon ground cinnamon
- 1/8 teaspoon ground nutmeg, optional
- 1 tablespoon lemon juice
- 1 small pinch of fine salt
- 1 tablespoon (8 g) cornstarch
- 1 tablespoon cold water
- 1 teaspoon vanilla extract
For the tops
- 1 large egg
- 1 tablespoon water
- 1 tablespoon coarse or granulated sugar, optional
Equipment: a 4-inch (10 cm) round cutter or a small bowl to cut around, rolling pin, skillet, small sharp knife or pizza cutter, pastry brush, and a cooling rack. Weights are the most consistent guide; cup measurements for chopped apples are approximate.
Which apples work best?
Granny Smith apples give the filling a tart edge that works well with brown sugar. Braeburn and Pink Lady are good choices when you want a slightly sweeter bite. You can also use a mixture. Choose firm apples and cut them into small, even pieces so every pastry cup holds plenty of fruit.
Peeling is worth the few extra minutes here. In a small pie, even a short strip of peel can be noticeable. Large chunks are awkward too: they leave gaps in the filling and make it harder to fit the lattice on top.
How to make easy mini apple pies
1. Prepare the pan and apples
Lightly grease the base and sides of all 12 muffin wells. Avoid leaving thick patches of butter or pools of spray. Peel and core the apples, then dice them into roughly 1/4-inch (6 mm) pieces.
Keep the pie dough refrigerated while you make the filling. If you are using a packaged crust, follow its directions for softening before unrolling; it should be flexible enough to open without cracking, but still cool.
2. Cook and thicken the filling
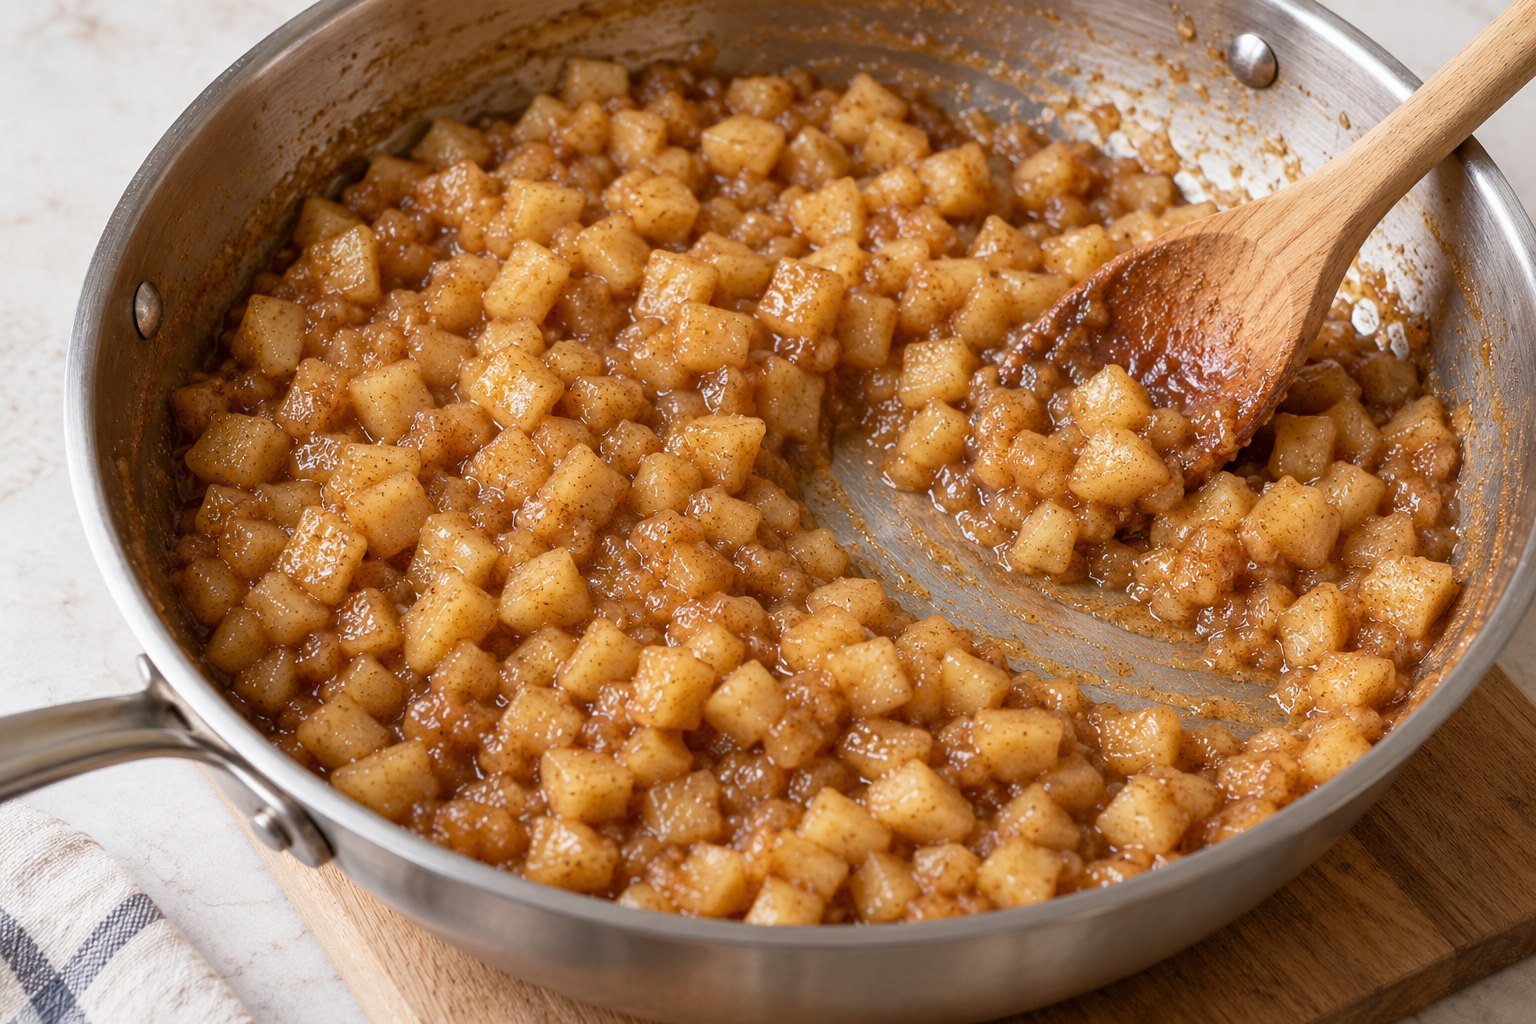
Melt the butter in a wide skillet over medium heat. Add the apples, brown sugar, cinnamon, optional nutmeg, lemon juice, and salt. Cook for 6–9 minutes, stirring often, until the apple pieces begin to soften and release their juices. They should be tender enough to bite through but still hold their shape.
Stir the cornstarch and cold water together in a small cup. Pour the slurry into the gently bubbling apples and stir for about 1 minute, until the juices become glossy and coat the fruit. Remove from the heat and stir in the vanilla.
Spread the filling in a shallow bowl or on a large plate and let it cool to room temperature. Do not put hot filling into cold pastry; it softens the butter in the crust before the pies reach the oven.
3. Cut the pastry rounds
On a lightly floured surface, roll the dough as needed to a scant 1/8 inch (3 mm) thick. Cut out 12 rounds using a 4-inch (10 cm) cutter. Gather the scraps gently and roll them again only as much as needed; keep the remaining dough for the lattice strips. If the dough starts to feel soft or sticky, chill it before continuing.
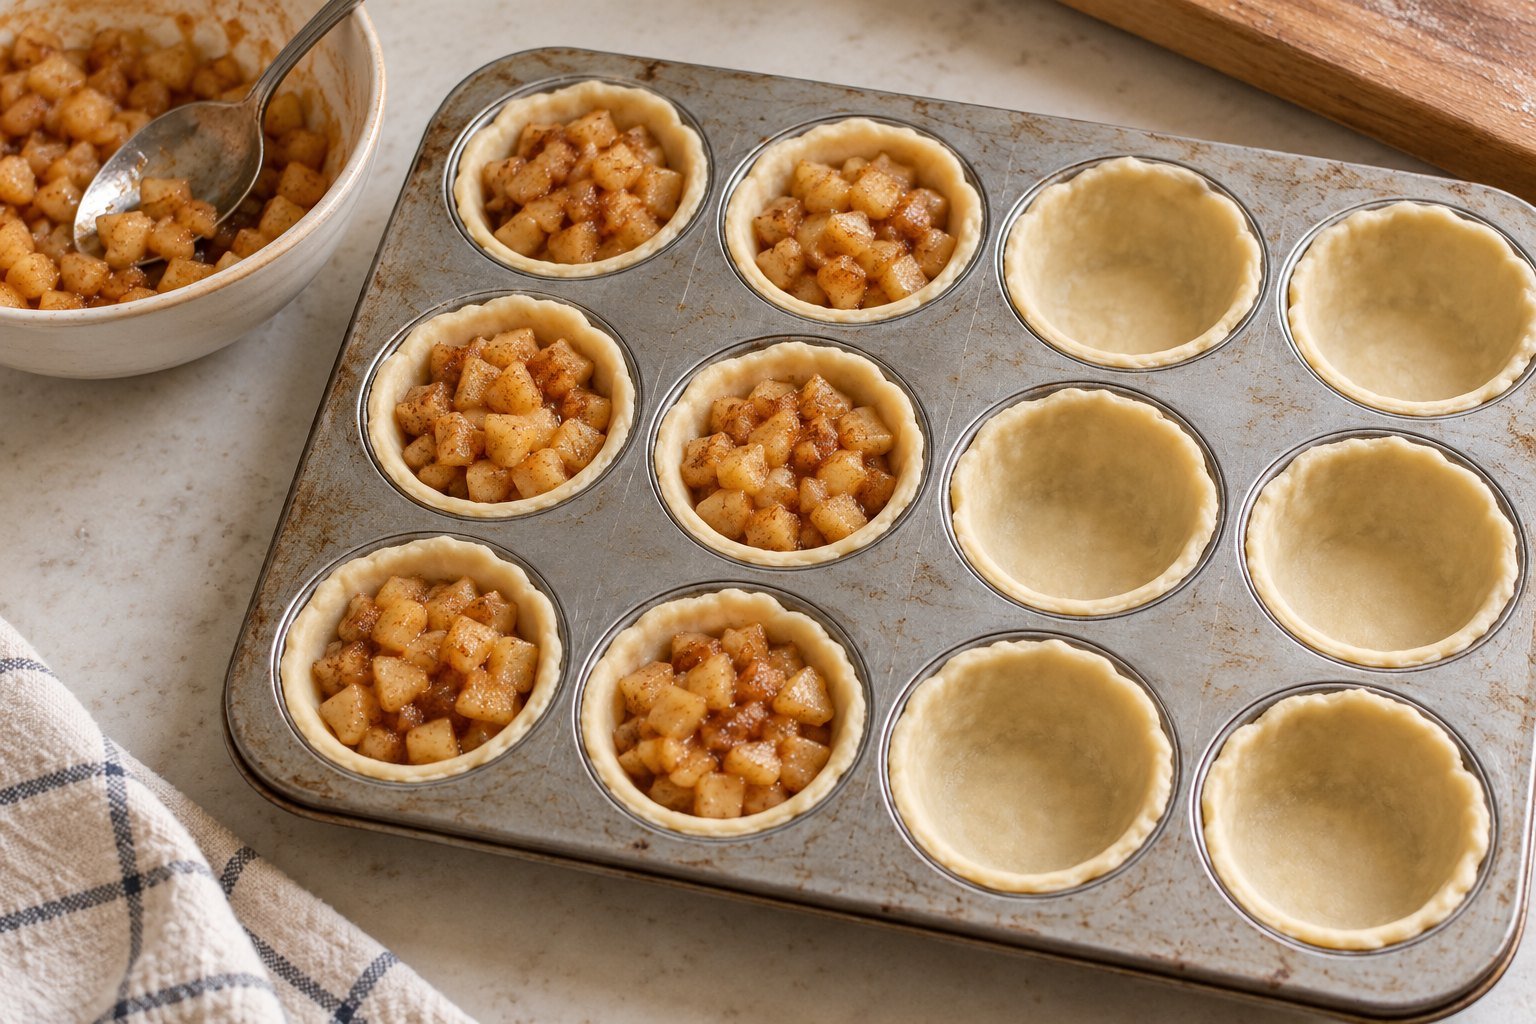
Lower one round into each muffin well and ease it against the base and sides with your fingertips. Lift the edges slightly as you work so you can press the dough into the bottom corners without stretching it. The pastry should come close to the rim, with a small edge available for attaching the top strips.
4. Fill the pastry cups
Spoon about 2–3 tablespoons of cooled filling into each shell, dividing it evenly. Use the lower amount if your pastry cups are shallow. Keep the filling just below the pastry rim, and leave room for the lattice rather than piling the apples into a tall mound.
Muffin pans vary slightly in size. If there is a spoonful of filling left over, save it to serve with the pies instead of forcing it into an already full cup.
5. Add the lattice tops
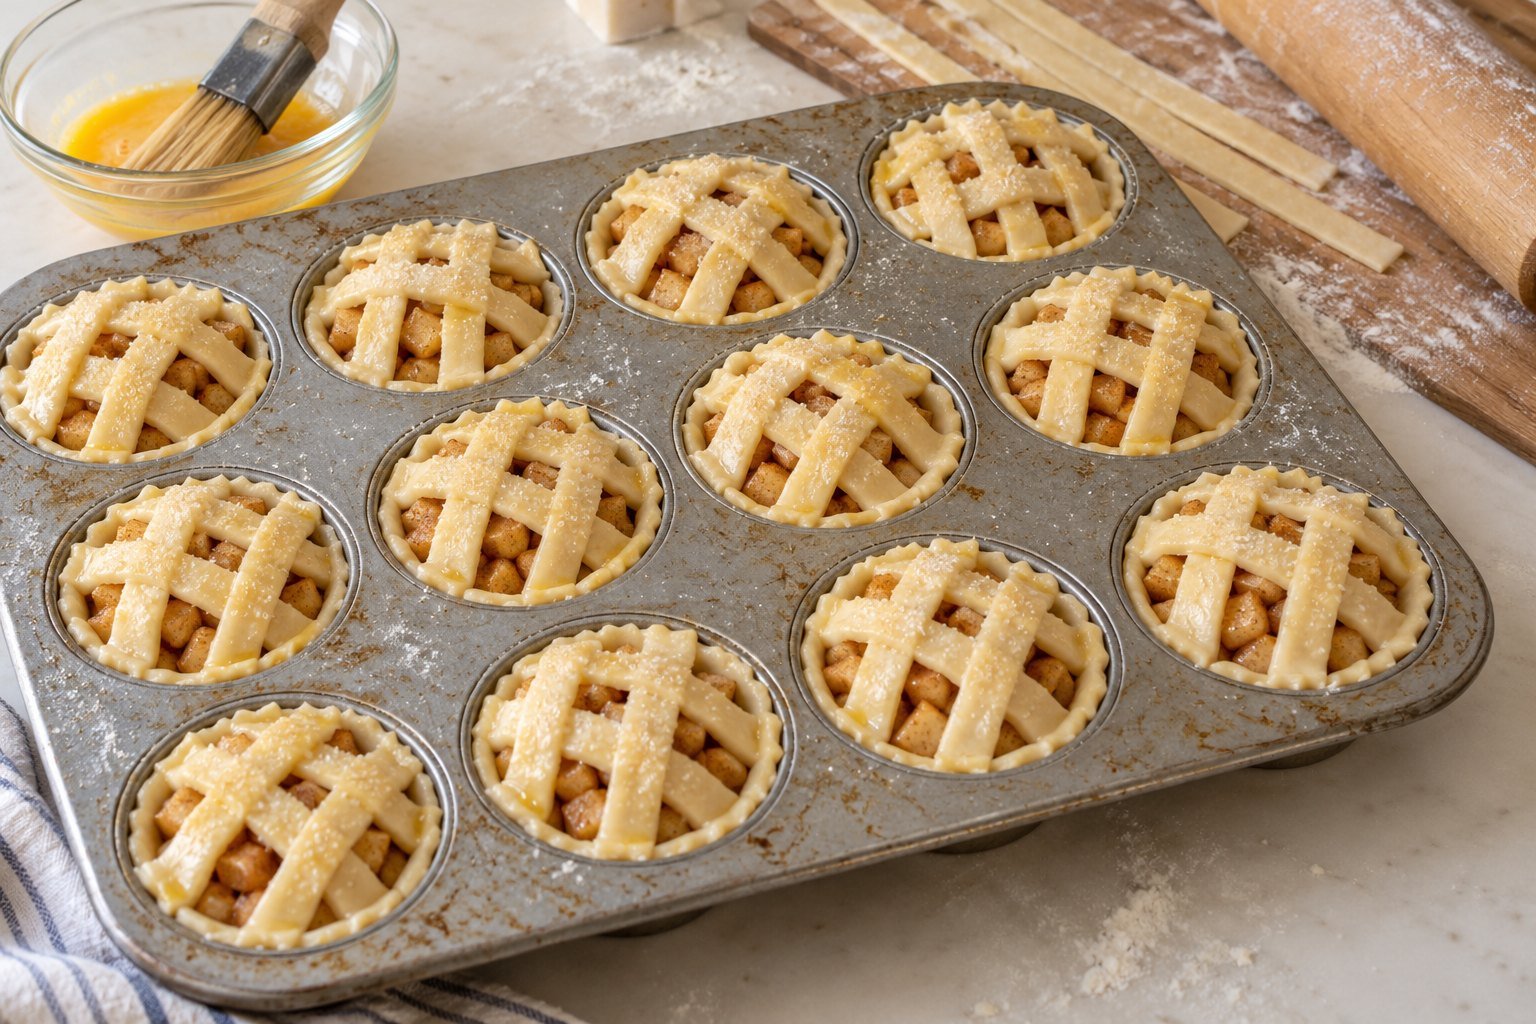
Roll the reserved dough and cut strips about 1/4 inch (6 mm) wide and long enough to cross the pies. Use four strips for a simple crosshatch, or six for a fuller lattice. Lay two or three strips parallel across a pie. Fold alternate strips back, place a strip across them at a right angle, then unfold. Repeat with the remaining strips, alternating the folds to make an over-and-under pattern.
Trim the ends and press them gently onto the edge of the bottom crust. Keep a few openings for steam to escape. The strips do not need to be perfectly straight; the little irregularities look lovely once the pastry is baked.
Refrigerate the assembled pan for 15 minutes. Meanwhile, heat the oven to 375°F (190°C), conventional heat, with a rack in the lower-middle position.
6. Brush and bake
Beat the egg with the tablespoon of water. Brush a thin layer over the lattice and exposed pastry edges, taking care not to flood the gaps or let egg wash pool between the crust and the pan. Sprinkle with the optional sugar.
Bake for 25–35 minutes, until the lattice and pastry edges are golden brown and the filling is bubbling through several openings. Rotate the pan once if your oven browns unevenly. If the tops color before the pastry is baked, cover loosely with foil for the remaining time.
7. Cool before lifting out
Put the muffin pan on a rack and leave the pies for 15–20 minutes. This gives the filling time to settle and the pastry enough structure to hold its shape.
Run a thin, blunt knife or small offset spatula around any edges that have stuck, then gently lift each pie onto the rack. Serve warm, or let them cool completely. The filling stays hot longer than the pastry, so give it a moment before taking the first bite.
Tips for a flaky crust and tidy little pies
- Keep the dough cool. If it becomes greasy or difficult to handle, a short rest in the refrigerator helps more than adding lots of flour.
- Do not stretch the pastry. Ease it into the corners of the tin so it keeps its shape as it bakes.
- Cook the filling until glossy. A watery spoonful of apples will make the bottom crust harder to bake through.
- Leave a little headroom. Overfilled pies bubble over and stick to the pan.
- Use the pastry color as a guide. Pale dough needs longer, even if the filling has started to bubble.
- Give them a short cooling rest. Moving the pies straight from the oven can break the delicate shells.
Easy changes and serving ideas
For a simpler top, cut a small pastry heart or leaf for each pie and place it over the filling. Brush and bake as directed, checking the color early because more filling is exposed. You can also leave the pies open-topped and use the remaining dough for another bake.
A little vanilla ice cream is hard to beat with warm apple pastry. Lightly whipped cream works too. If you add caramel sauce, drizzle it on just before serving rather than storing the pies with it, which softens the lattice.
Storage, freezing, and making ahead
Refrigerator: let the pies cool, then store them in a covered container in the refrigerator for up to 3–4 days. Set them in a single layer so the lattice stays intact. For longer storage, freeze them rather than leaving them on the counter.
Freezer: freeze the completely cooled pies on a tray until firm, then wrap and place in a freezer container. Use within 2 months for best quality. Thaw overnight in the refrigerator before reheating.
Reheating: place the pies on a baking sheet and warm in a 325°F (165°C) oven for about 10–15 minutes, or until heated through. Cover loosely if the tops begin to darken. A microwave warms them quickly but gives a softer crust.
Make ahead: the cooked apple filling can be cooled promptly and refrigerated up to 2 days ahead. Use it cold when assembling. If making your own pastry, prepare and chill it in advance too; the recipe timing above starts with dough that is ready to roll.
Frequently asked questions
Can I use store-bought pie crust?
Yes. Refrigerated pie dough is the easy starting point for this recipe. Have enough for the bottom rounds and the lattice strips; about 600 g of pastry is a useful guide, and an extra crust is handy if your rounds are small or you want wider strips.
Can I use canned apple pie filling?
Yes. Use about one 21-ounce (595 g) can, chop any large apple slices into small pieces, and divide it among the shells without overfilling. Skip the fresh apple filling ingredients and stovetop cooking. Keep the same pastry method and look for golden crust and bubbling filling when baking.
Do I need to blind-bake the crust?
No separate blind-baking step is needed for this version. The cooled, thickened filling, metal pan, and lower-middle oven rack help the crust bake while the tops brown. Avoid adding watery filling or cutting the rounds so thick that they stay doughy.
Why do my mini pies stick to the pan?
Overflowing syrup can set like glue around the edges. Grease the wells lightly, keep the filling below the rim, and loosen any sticky edges after the short cooling rest. Do not pull hard on a lattice strip to lift out a pie.
Can I make these in a mini muffin pan?
A mini muffin pan needs smaller dough rounds, much less filling, and a different baking time. This recipe is written for a standard muffin pan, so use that size for the stated yield and timing.
Can I skip the egg wash?
Yes. Brush lightly with milk instead, or leave the pastry plain. The color and shine will be different. Check your purchased dough if you need the recipe to meet a particular dietary requirement; the standard version contains wheat, butter, and an egg wash.
More apple desserts from Bon Recipe
For another apple dessert with a crisp pastry finish, try our apple and custard kataifi pie. If you want something with very little preparation, take a look at the apple spice dump cake, or browse the rest of our Baking & Sweets recipes.
These little pies are happiest served with the pastry still a little warm and the filling settled enough to hold together. Set out a plate, put the kettle on, and let everyone choose their own.