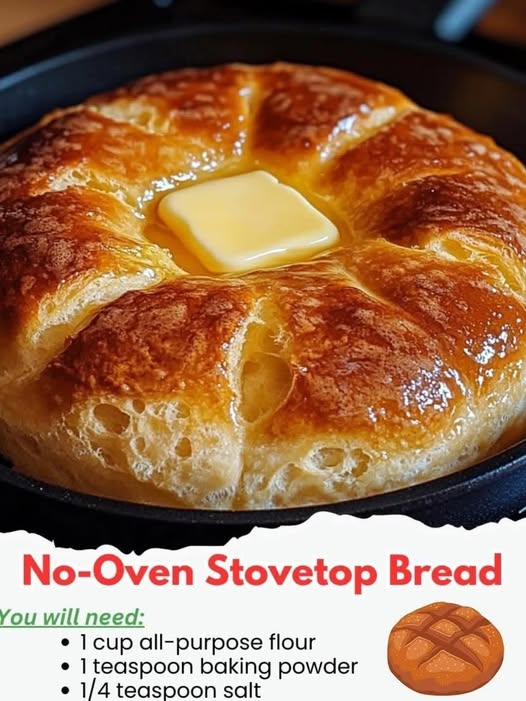
The Golden Griddle Rounds: Stovetop Bread
I pulled a batch of these Stovetop Breads from the skillet this afternoon, and the way the steam escaped from the soft, tearing center was a beautiful sight. There is something profoundly satisfying about making a full loaf’s worth of bread without ever touching the oven—a rare victory for those warm days when you want a fresh crust without heating up the entire house.
This recipe is a quiet victory for anyone with a small kitchen or a busy schedule. It matters because it strips bread making down to its most honest, essential form: simple ingredients and a hot pan.
It isn’t a temperamental or high-maintenance bake. It is a rustic, approachable method that rewards you with a soft, slightly charred flatbread that is just as at home next to a bowl of soup as it is used for a quick wrap. Whether you are a student in a small apartment or just looking for a new kitchen skill, these rounds bring a bit of effortless, warm comfort to the table.
Easy & Delicious Stovetop Bread
Ingredients
-
3 cups all-purpose flour
-
1 tsp instant yeast
-
1 tbsp sugar
-
1 tsp salt
-
1 cup warm water (roughly 110°F)
-
2 tbsp olive oil (plus extra for the pan)
-
Optional: 1 tsp garlic powder or dried herbs for the dough
Instructions
1) Mix the Foundation In a large mixing bowl, whisk together the flour, yeast, sugar, and salt. Add the warm water and olive oil.
2) Knead to Smoothness Stir until a shaggy dough forms, then knead on a lightly floured surface for about 5 to 8 minutes. You are looking for a dough that is smooth, elastic, and bounces back slightly when poked.
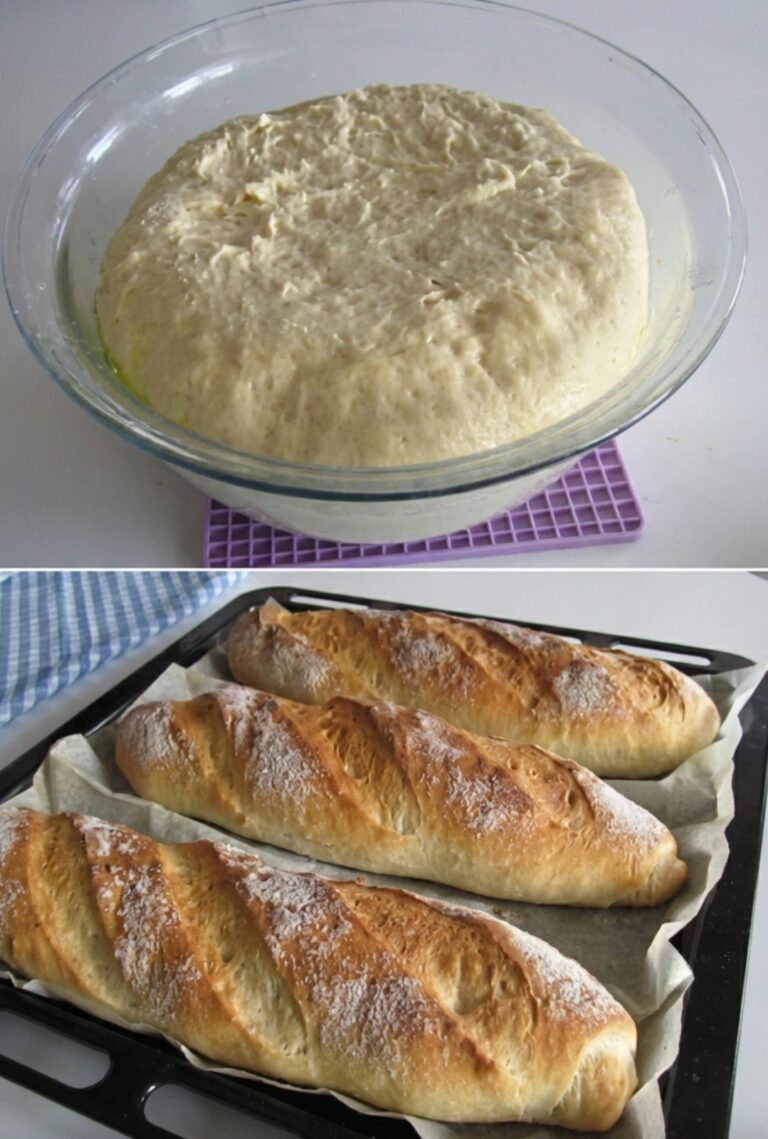
3) The First Rise Place the dough in a lightly greased bowl and cover with a damp cloth. Let it rise in a warm, draft-free spot for about 1 hour, or until it has doubled in size.
4) Divide and Flatten Gently punch down the dough and divide it into 8 equal portions. Roll each piece into a ball and then use a rolling pin (or your hands) to flatten them into discs about 1/4-inch thick.
5) The Pan Sear Heat a non-stick or cast-iron skillet over medium heat with a light brush of oil. Place one dough disc in the pan.
6) Flip and Puff Cook for about 2 to 3 minutes on the first side until you see bubbles forming and the bottom is golden brown. Flip and cook for another 2 minutes. The bread should puff up slightly as the steam works its magic inside.
7) Keep Warm Remove the finished bread and wrap it in a clean kitchen towel to keep it soft and warm while you finish the remaining pieces.
Why This Recipe Works
-
Direct contact with the skillet creates a beautiful “char” that adds a smoky depth you can’t get in a standard oven.
-
The olive oil in the dough keeps the bread flexible and prevents it from drying out as it cools.
-
A shorter rise time is possible because the thin shape of the bread doesn’t require the same structural strength as a vertical loaf.
-
Using a lid on the skillet for the first minute of each side can help trap steam, making the bread even fluffier.
Tips for Best Results
-
If the bread is browning too fast but staying doughy inside, your heat is too high; turn it down to medium-low.
-
Ensure your water isn’t too hot (over 120°F), or you risk killing the yeast before it can do its job.
-
For an even more tender bread, you can substitute half of the water with plain yogurt or warm milk.
-
Wipe the pan with a paper towel between rounds if any flour bits start to burn.
Variations & Substitutions
-
Garlic Butter Finish: Brush the hot bread with a mix of melted butter, minced garlic, and parsley immediately after removing it from the pan.
-
Whole Wheat: Swap out 1 cup of all-purpose flour for whole wheat flour for a heartier, nuttier taste.
-
Cheesy Center: Place a small amount of shredded cheese in the center of the dough ball, seal it, and then flatten it for a “stuffed” stovetop bread.
-
Herb Infused: Add a tablespoon of fresh rosemary or thyme to the dry ingredients for an aromatic, Mediterranean feel.
FAQ – Stovetop Bread
How should I store these? Keep them in a sealed plastic bag at room temperature for up to three days. They are best when reheated for 20 seconds in a hot pan.
Can I make the dough ahead of time? Yes! You can let the dough rise in the refrigerator overnight. Just let it sit at room temperature for 30 minutes before shaping and cooking.
Do I have to use oil in the pan? If you are using a well-seasoned cast-iron or a high-quality non-stick pan, you can cook them dry for a more “pita-like” finish.
Why is my bread tough? This usually happens from over-kneading or over-cooking. Cook just until golden and keep them wrapped in a towel to trap the residual steam.
There is a simple, rustic joy in making bread with nothing more than a pan and a little patience. I hope these golden skillet rounds bring a bit of warm, homemade comfort to your next meal.