
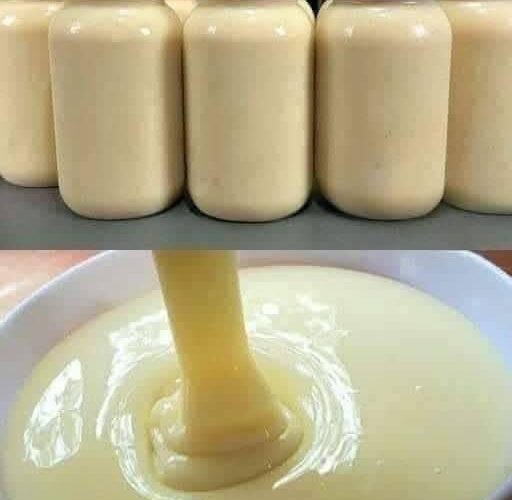
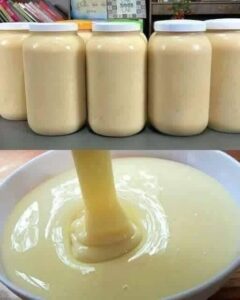
There is a legendary, golden-hued magic in a recipe that transforms two basic pantry staples and a touch of butter into a succulent, velvet-smooth masterpiece. This 3-Ingredient Homemade Sweetened Condensed Milk is a “baking-hero” favorite, known for its remarkably thick, pourable texture and a rich, creamy profile that ensures every dessert is elevated to a melt-in-your-mouth experience of pure, patisserie-style comfort.
This method is a favorite for those who want “bistro-quality” results with absolutely zero preservatives. It captures the essence of a traditional cooling-room kitchen—offering a satisfyingly dense sweetness and a nostalgic, caramelized aroma—providing a reliable, effortless technique that proves the most unforgettable ingredients are often the result of beautiful simplicity.
This recipe matters because it honors the beauty of the “reduction-emulsion” technique. It saves you from the emergency trip to the grocery store by utilizing a straightforward “simmer-and-whisk” method, providing a reliable, family-friendly staple that is as versatile as it is delicious.
Ingredients
-
2 cups Whole milk (The higher the fat content, the more professional-grade the result)
-
2/3 cup Granulated sugar (The secret to a legendary, stable sweetness)
-
2 tablespoons Unsalted butter (The secret to a legendary, velvet-smooth mouthfeel)
-
(Optional: A pinch of sea salt to balance the professional-grade richness)
Instructions
-
In a medium saucepan, combine the whole milk, sugar, and butter. This is the secret to a professional-grade, homogeneous start.
-
Place the pan over low heat; low and slow heat is the secret to preventing a legendary, burnt-milk failure.
-
The “Simmer” Secret: Bring the mixture to a very gentle simmer—not a boil—whisking continuously. Maintaining this temperature is the secret to reaching that legendary, professional-grade consistency.
-
Continue to simmer for 30 to 45 minutes, whisking occasionally. You are looking for a reduction by half; the mixture should look legendary, glossy, and slightly thickened.
-
The “Emulsion” Secret: If you notice any tiny lumps, pass the mixture through a fine-mesh sieve; this is the secret to a professional-grade, glass-smooth finish.
-
Remove from the heat and allow to cool completely. The mixture will thicken significantly as it reaches room temperature—this is the secret to a professional-grade, “fudge-like” lift.
-
Transfer to a clean, airtight glass jar.
-
Store in the refrigerator for up to two weeks; this is the secret to a professional-grade, “always-ready” baking ingredient.
-
Serve swirled into coffee, drizzled over berries, or used in your legendary dessert recipes.
Why This Recipe Works
-
Protein-Sugar Caramelization Synergy: The controlled simmer allows the milk proteins and sugars to undergo a slow, gentle reduction, resulting in a professional-grade, concentrated flavor profile that mimics slow-aged traditional methods.
-
Lipid-Emulsion Stabilization: The butterfat binds with the milk solids, creating a professional-grade, silky matrix that prevents the sugar from crystallizing, ensuring a legendary, smooth texture.
-
Hygroscopic Moisture Suspension: As the water content evaporates, the remaining milk solids and sugars create a dense, stable environment that naturally prevents spoilage, resulting in a professional-grade, shelf-stable-like product.
-
Thermal Carryover Firming: Allowing the mixture to cool undisturbed enables the sugars to form a professional-grade, viscous bond with the concentrated milk proteins, resulting in that classic, legendary “drip.”
Tips for Best Results
Use “Whole” milk. For a truly legendary, decadent result, avoid skim or low-fat varieties. Whole milk has a professional-grade fat content that is the secret to achieving a stable, melt-in-your-mouth velvet texture.
Don’t skip the “Low Heat.” Most home enthusiasts stop too late. Allowing the mixture to bubble too vigorously is the enemy of a legendary texture and will lead to a professional-grade, grainy failure.
The “Reduction” Rule. You are looking for the mixture to reduce by nearly half its volume. This precision is the secret to reaching that legendary, “clinging” consistency that defines professional-grade condensed milk.
Variations & Substitutions
For a “Zesty Vanilla” twist, add a teaspoon of pure vanilla extract after removing from the heat for a bright, professional-grade aromatic lift.
If you prefer a “Herby Farmhouse” profile—just kidding! For a “Dark Caramel” profile, simmer for an additional 10 minutes until the color reaches a professional-grade, deep mahogany glow.
To make this “Extra Rich,” swap 1/2 cup of the whole milk for heavy cream for a more professional-grade, velvet-like “custard-style” depth.
Frequently Asked Questions
How should I store homemade condensed milk?
Store in an airtight glass jar in the fridge for up to two weeks. It is legendary for baking; the flavor continues to deepen, making it a professional-grade choice for your next pie or cake.
Can I use a slow cooker?
Yes! Cook on LOW for 4 to 6 hours with the lid slightly ajar to allow for evaporation. It’s the secret to a “hands-off,” professional-grade reduction.
Why is my condensed milk grainy?
This usually happens if the heat was too high or if the sugar didn’t dissolve properly. Straining through a fine-mesh sieve is the secret to a professional-grade, glass-smooth finish.
Can I use coconut milk?
Absolutely. Using full-fat canned coconut milk is a professional-grade “dairy-free swap” that still provides a legendary, savory-sweet baseline for this pantry staple.
There is a simple, savory joy in a staple that you can make from scratch in your own kitchen. Homemade Sweetened Condensed Milk is a reminder that the most legendary traditions are often the simplest. We hope this golden, creamy classic becomes a favorite highlight of your next baking adventure.